BLOG

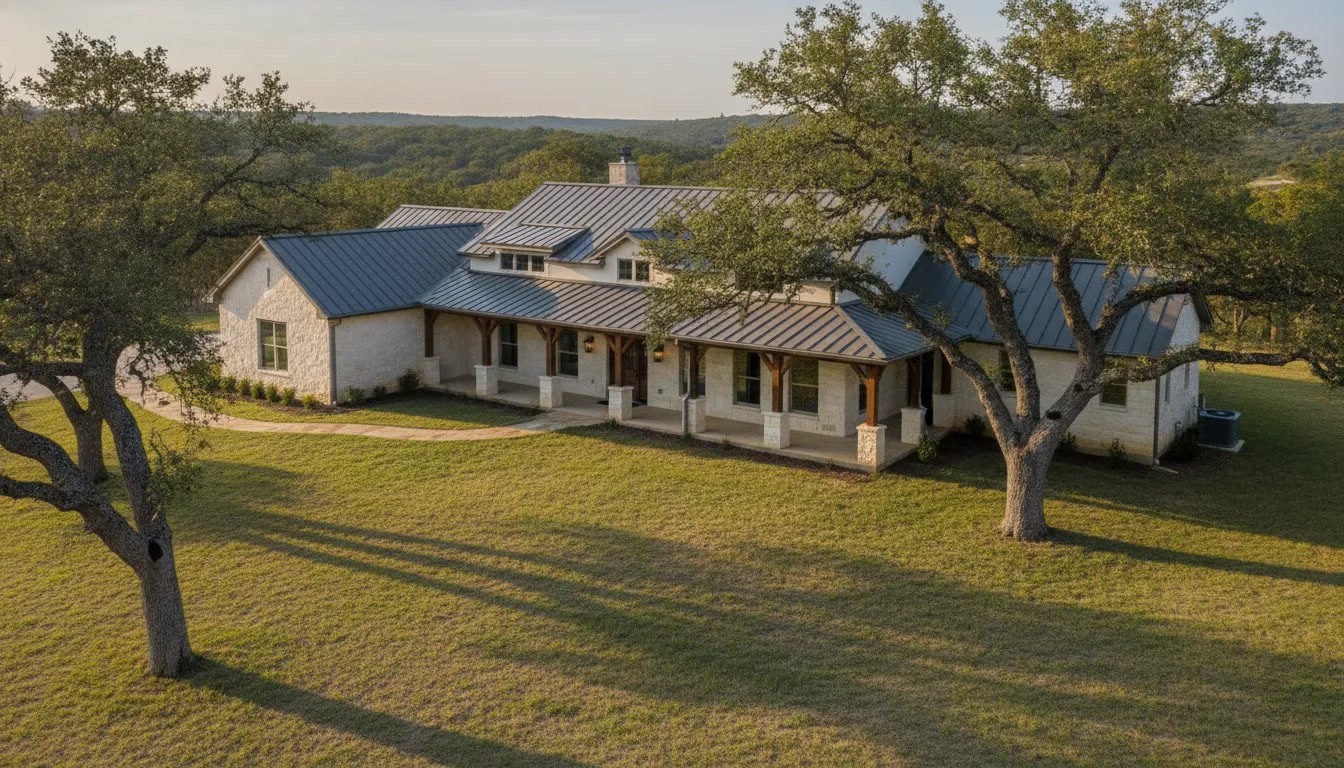
Limestone custom home on a large oak-shaded lot in the Texas Hill Country

Builders in the Vintage Oaks Community: What to Ask

Choosing among builders in the Vintage Oaks community in New Braunfels is not the same as picking a builder anywhere else in town. The community is a master-planned neighborhood of one-acre-and-larger homesites, and new homes go through an Architectural Review Board before work can start. A builder who has not built here still has to learn the review, the site rules, and how your lot sits.

Use the questions below before you sign. They cover the review, the lot, the build path, and how you will stay informed. They are not a tour of the neighborhood. For that, start with the Vintage Oaks community page.

Contact JLP Builders about your Vintage Oaks build

What builders in Vintage Oaks New Braunfels have to clear first

Vintage Oaks publishes its own builder resources, and the rules are specific. The Architectural Review Process cannot begin until the lot has closed. Review of plans and details can take up to 30 days. If a home is being built for an owner, the builder or the owner may submit the application and the fees. The owner's association account must be current before review starts.

Ask any builder you interview three things:

  • Have you submitted plans to the Vintage Oaks Architectural Review Board, and how long did the last review take?
  • Who files the application and pays the fees, you or the builder?
  • What has to be on the lot before the first work day?

That last question is easy to skip and expensive to miss. Before construction may begin, the community requires each of these items:

  • Architectural Review Board approval.
  • A dumpster of at least 30 cubic yards and a plastic-lined dump box.
  • A chemical toilet that does not face the road.
  • A construction entrance, with a culvert where one is required.
  • Fire-suppression equipment on site.
  • Receipt of the builder deposit and all fees.

Work has to match the approved plans, and the site has to stay clean.

The community also lists what is not allowed on a construction site. A builder who treats these as suggestions can pick up fines. The builder deposit is refunded only after fines for violations or roadway damage are taken out, and a refund request has to be made in writing. These are the site restrictions:

  • Drugs, alcohol, firearms, and animals are not allowed.
  • Children under 16 are not allowed on the site.
  • Loud music that can be heard from the road or a neighboring lot is not allowed.
  • Unapproved signs are not allowed.
  • Extra vehicles or equipment cannot be left on site.
  • Overnight stays are not allowed.
  • Crews cannot use community common areas.

Landscaping has its own clock. The landscaping application is due no later than 30 days before the expected completion date. The landscape has to be fully installed no later than six months after move-in. Ask who designs that plan. Ask who files it. Ask who schedules the final landscape inspection.

These rules come from the community, not from any one builder. Read the current Vintage Oaks builder resources yourself, because fees and forms can change. JLP Builders has built in this neighborhood and knows the guidelines, the land, and what it takes to get a home approved here. That experience is a fair question to test. Ask for a recent Vintage Oaks address, not a general Hill Country portfolio.

Questions about the homesite before you pick a builder

Vintage Oaks offers homesites of one acre and larger. Sections may be gated or open. Elevation, views, slope, and tree cover all change by lot. The community's building outline tells buyers to weigh acreage and location. It also says to weigh orientation, views, a gated or open section, and frontage. Those choices change the house more than the brochure does.

A long view can force the living spaces to one side of the plan. A slope can change the foundation and the driveway. Oaks you want to keep can block a standard garage placement. Ask the builder to walk the lot with you. Mark where the house would sit before you fall in love with a plan that does not fit.

JLP's build-on-your-lot path starts with a site visit and a flagged home placement. After the professional services agreement, the construction manager reviews the building site. On a turnkey path, the early meeting is about the community and the plan, and the price presentation comes before the contract. Either way, you should hear a plain answer about drainage, the build pad, and which trees stay.

Wastewater is a separate question from the review board. If your lot uses an on-site sewage facility rather than city sewer, ask the local permitting authority what permit and approved plan are required before installation. The Texas Commission on Environmental Quality's permit guidance says OSSF permits are generally required, but local requirements and limited exemptions can apply. Ask who orders the site evaluation, who submits the permit, and whether that cost is inside the price you were shown. Do not treat a verbal "septic should be fine" as a design.

Also ask what the builder will and will not change. A wide front setback, a required construction entrance, or a view you want to keep can all push the plan. The right answer is a marked site plan, not a promise that any floor plan will work.

Turnkey, your own lot, or a home already underway

Vintage Oaks lets buyers build with a builder of their choice. The community also keeps a list of builders who are active there. JLP is on that list. The community does not recommend one builder over another. It does offer a Builder Match program that shares owner feedback. That feedback covers quality, budget, timing, and service after completion. Use that if you want owner conversations. Then ask the builder your own questions. A list is not a fit.

JLP offers three ways to get a home in this community. They are not the same job.

PathWho has the lotWhat to ask
TurnkeyJLP buys the land and gets the construction loan.Which section, which plan, and what the price includes.
Your lotYou already own the homesite.Inspiration plan or custom plan? When is the site visit?
InventoryThe home is already underway or finished.What can still change? What did review already lock?

On a turnkey build, JLP's published process starts with an initial meeting and plan selection. It moves through the application and the price presentation. Then come the contract and the design appointments. Pre-construction follows. That is where plans go to the lender for appraisal and to the community review board. It is also where the construction loan closes. If you already own the lot, the early steps add a site visit, a flagged placement, and a building-site review. Custom plan drafting happens only on that custom path. It starts only after the professional services agreement.

Ask which of those three paths the price you were given belongs to. A number for an inventory home is not a number for a custom plan on a sloped, oak-covered lot. JLP's projects generally fall in a broad range, and the company does not publish a per-square-foot rate. Any figure you hear in a meeting is a planning range for that lot and that plan. It is not a guaranteed price. Get the current number from the team, in writing, after the site and the plan are real.

If your timeline is short, ask about homes already underway before you start a full custom design. Inventory in Vintage Oaks can be move-in ready or nearing completion. The tradeoff is real: fewer choices, a faster move. The custom home building process spells out both the turnkey and build-on-your-lot sequences so you can see the steps before a sales meeting.

What to ask about design, review, and changes

Design is where a Vintage Oaks build gets specific. JLP's floor plans come in over 20 styles, and the team will work with you to fit one to the lot. In this part of the Hill Country, ask to compare Transitional, Farmhouse, Modern Farmhouse, Contemporary, and Spanish Style options. Ask to see a plan that has already been approved in Vintage Oaks, not only a rendering.

Then ask when the design locks. On JLP's process, design appointments come after the contract and the builder deposit. Plan changes after the review board has approved a set of drawings are not free, and they may need another review. A good question is: if we move a window or add a covered patio after approval, who resubmits, and does the 30-day review clock start again?

The community's own building steps put the architectural review after design, the agreement, financing, and finish selections. JLP's pre-construction phase is the point where plans and engineering go to that review. Ask to see the checklist the builder uses for that submittal. You want to know the drawings include the site placement, the materials the guidelines care about, and the landscaping timing, not only the pretty elevation.

Finish choices deserve the same clarity. Ask which selections are included in the price presentation and which are allowances you will pick later. A builder who cannot show that split is asking you to compare two different houses. Start the meeting from a plan you have already looked at, not a blank page.

How you will hear about the build

The build itself is a sequence of meetings, not a single start date. JLP's published construction phase includes a pre-drywall meeting, a new-home demonstration, and a final walk before closing. Ask who attends those meetings and what you are expected to decide in each one. A meeting with no decision list is a tour. A meeting with a list is how you keep the house on track.

Ask how you will hear about ordinary days, not only the big meetings. JLP keeps clients informed with weekly calls that include the sales support team and the construction manager, plus daily construction-team logs in the Builder Trend client portal. The calls and the logs work together. The portal does not replace the conversation, and the conversation does not replace the written log. If a builder describes updates as "we'll text you," ask what is written down and who owns the weekly call.

Warranty is the last question, and it should be answered before you sign, not after the walkthrough. On JLP's custom home building process, the published warranty is 1-year workmanship, 2-year mechanicals, and a 10-year structural warranty. Ask how a warranty item is submitted. Then ask what sits outside that workmanship year. In Vintage Oaks, landscape installation can run six months past move-in. Get the answer in the contract, not in a brochure.

Two more checks belong on your list. Ask who your day-to-day contact is once construction starts, and ask what happens if a community fine is assessed during the build. The deposit rules say fines can come out of the builder deposit. You should know whether a fine caused by a trade partner is the builder's problem to fix before it becomes yours.

A short list to take into the first meeting

You do not need a long interview. You need a builder who can answer the Vintage Oaks version of a few plain questions. Take this order into the first meeting:

  1. Show me a home you built in Vintage Oaks and the review comments on that plan.
  2. Walk my lot, or the lot you are proposing, and mark the house, the drive, and the trees that stay.
  3. Tell me which path this is: turnkey, build on your lot, or inventory.
  4. Show me what is included in the price and what is still an allowance.
  5. Explain who files the Architectural Review Board application and what has to be on site before work starts.
  6. Tell me who calls me each week, where the daily log lives, and what the warranty covers after closing.

If those answers are vague, you are not behind. You are early. Vintage Oaks lots are large, and the review is real. A turnkey home and a custom plan on land you already own are different projects. Start with the questions. The plan and the price should follow them, not the other way around.

JLP builds custom homes in Vintage Oaks, including homes on lots buyers already own and homes on lots the team helps secure. The next step is a conversation about your lot, your timeline, and which of the three paths fits. Bring the questions above. Ask to see a Vintage Oaks example, not a generic one.

Ready to get a custom quote

Frequently Asked Questions

Do I have to use a builder from the Vintage Oaks list?

No. Vintage Oaks says you can work with a builder of your choice. The community also keeps a list of builders who are currently active there, including JLP Builders, and it offers owner feedback through its Builder Match program. A list is a starting point. It is not a requirement, and it is not a recommendation of one company over another.

Can review of my plans start before I close on the lot?

No. The community's Architectural Review Process cannot begin until the lot has closed. After a complete submittal, review can take up to 30 days. The owner's association account also has to be current before plans are reviewed. Ask your builder who files that application and when the fee is due.

What is the difference between turnkey and build on your lot in Vintage Oaks?

On a turnkey build, JLP acquires the land and obtains the construction loan, then you choose a plan and finishes. On a build-on-your-lot home, you already own the homesite, and the early steps include a site visit and a flagged placement. Inventory is the third path: a home that is already underway or finished, with fewer choices and a shorter wait.

Who handles the septic permit?

Ask this before you sign. If your lot uses an on-site sewage facility, that system needs a state and local permit before installation. A builder should be able to say who orders the site evaluation, who submits the permit, and whether that cost is inside the price you were shown.

How will I know what is happening during construction?

At JLP, you get weekly calls with the sales support team and the construction manager, and daily construction-team logs in the Builder Trend client portal. You also have a pre-drywall meeting, a new-home demonstration, and a final walk. Ask any builder you interview to name the person on the weekly call and the place where daily notes are written down.

Contact JLP Builders today

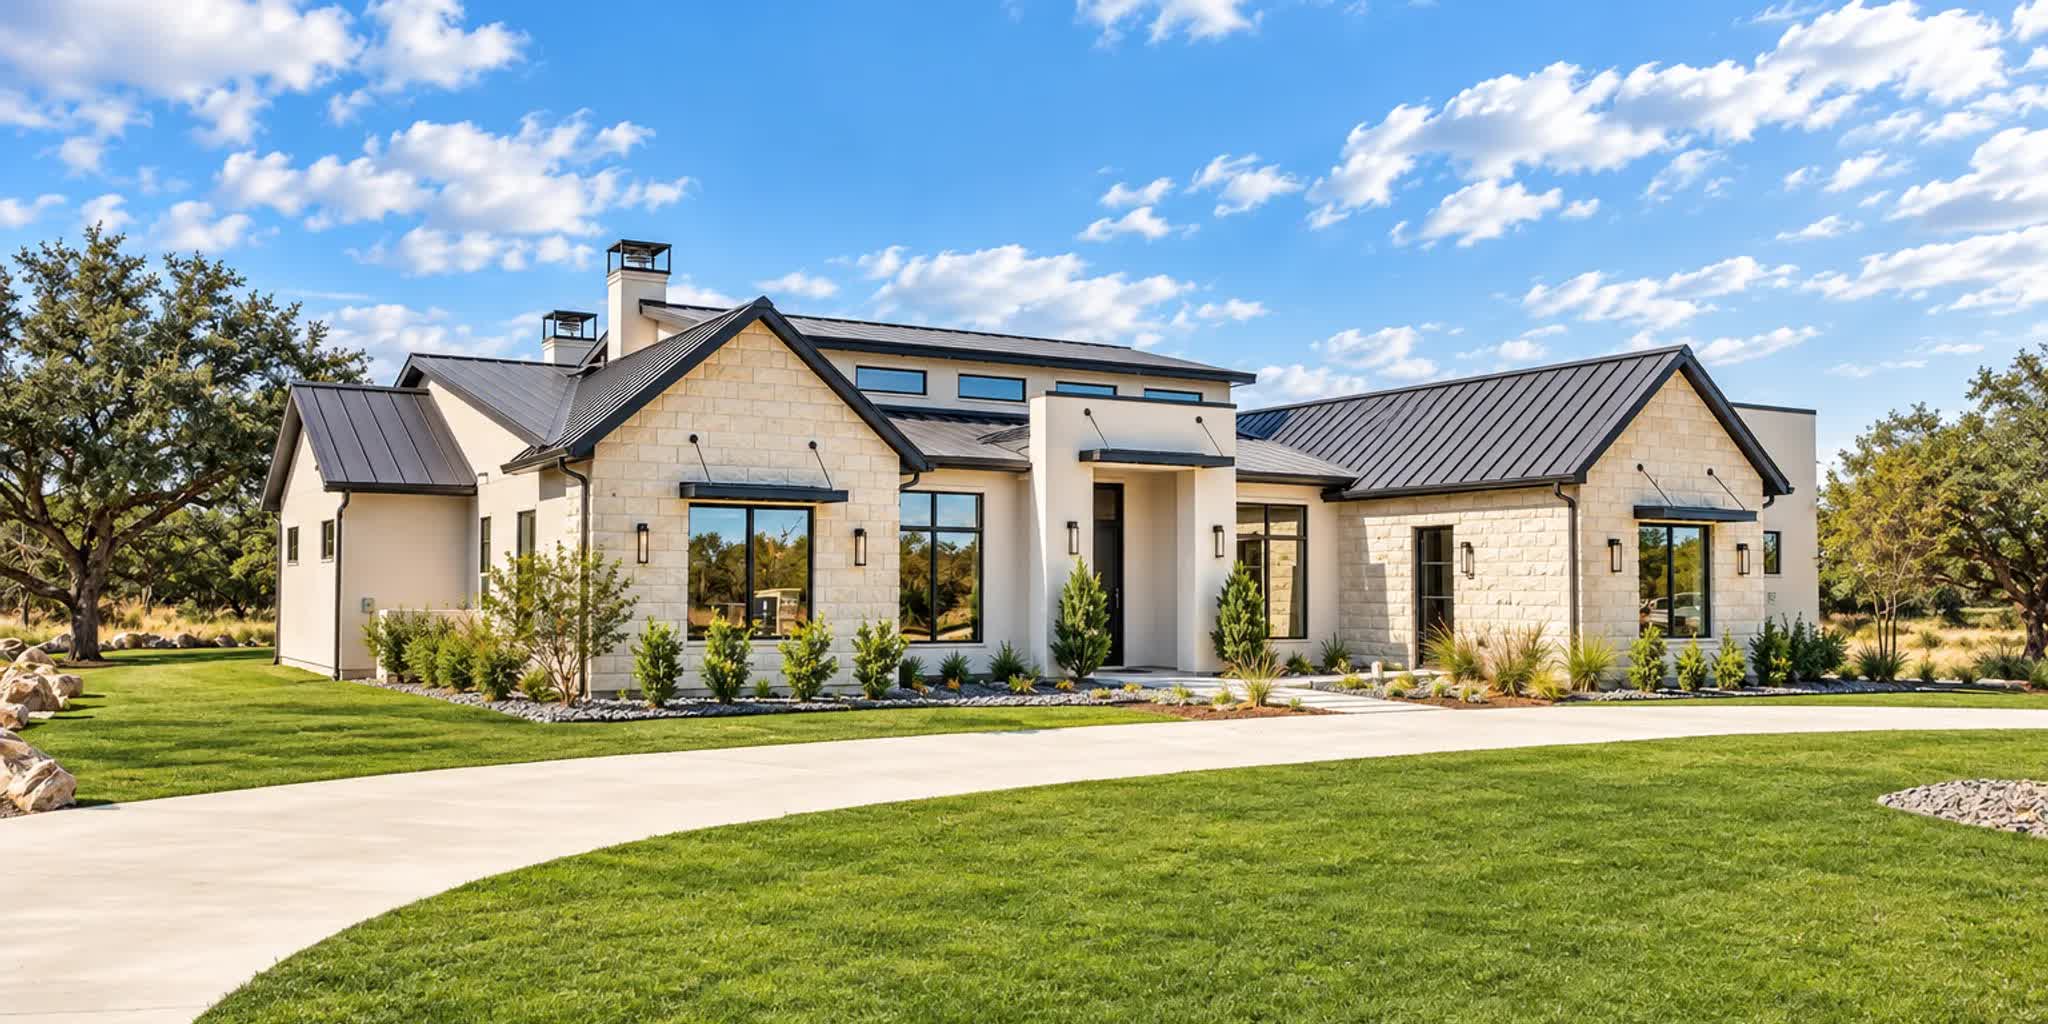
A welcoming custom home exterior in the Texas Hill Country near New Braunfels

Choosing a Custom Home Builder in New Braunfels: Questions to Ask

Choosing a custom home builder in New Braunfels is about more than liking a finished home. You're selecting a team and a process for a complex project, often months before construction begins. The right questions help you understand how a builder handles your lot, design priorities, decisions, and communication before you commit.

Read more ...
Open Texas Hill Country homesite with mature trees and a clear view of the terrain

How to Find Land for Sale in New Braunfels to Build On

Finding land for sale in New Braunfels is only the first part of choosing a homesite. A listing can look promising and still leave important questions about access, utilities, restrictions, terrain, or the cost of preparing the property. A careful search weighs the parcel itself against the home you hope to build and the checks you can complete before committing.

Start a conversation about building on your lot

Read more ...
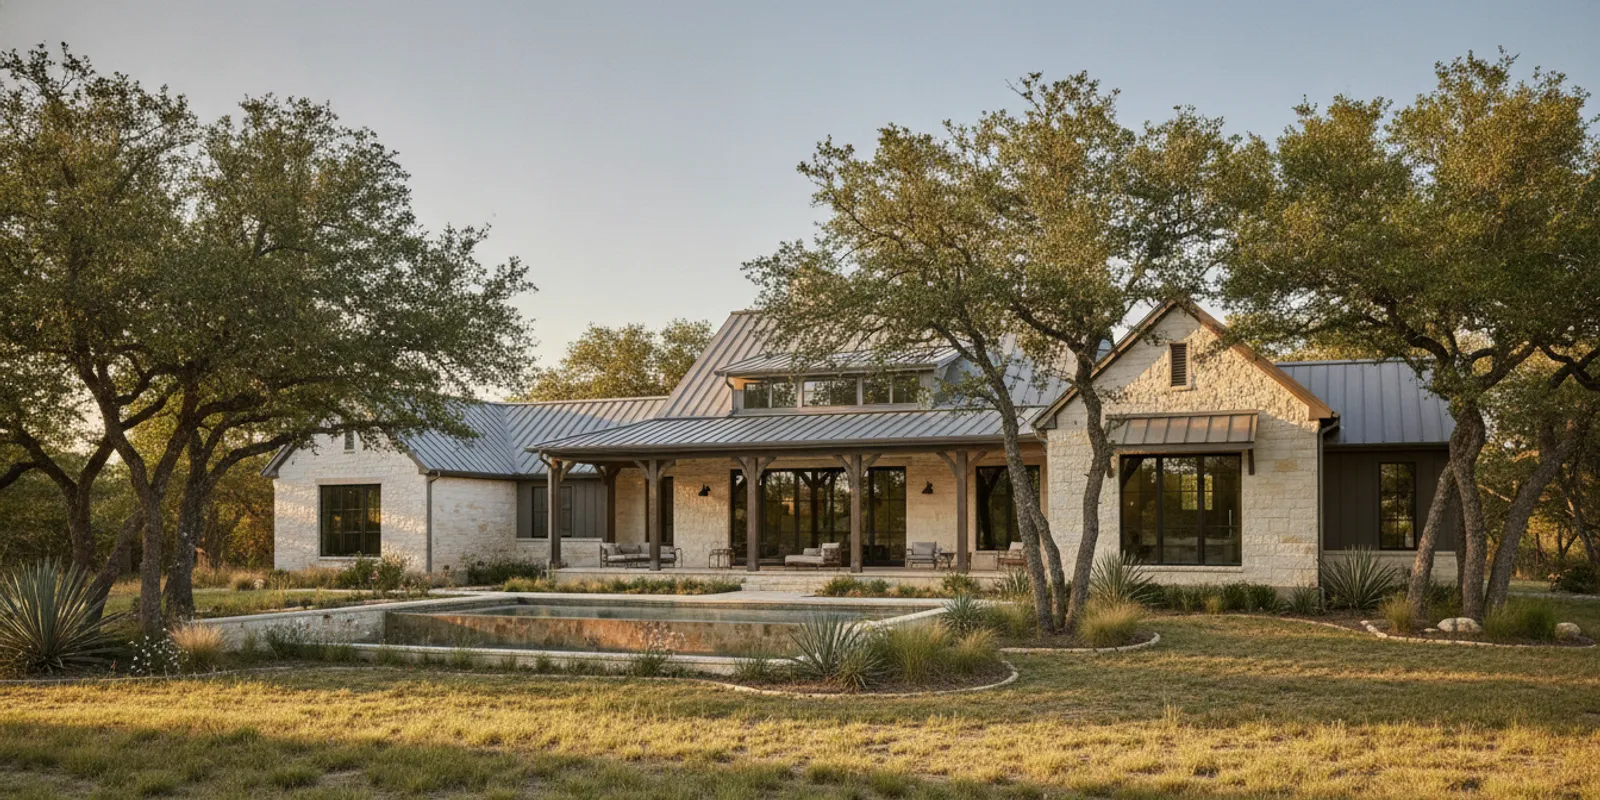
Custom Texas Hill Country home with stone exterior on a landscaped lot

Can You Build a Custom Home on Land With an HOA in Texas?

Yes, you may be able to build a custom home on land with an HOA in Texas. Whether you can build depends on the recorded restrictions and design rules for that specific lot, the association’s review process, and other requirements that apply to the property. Before you settle on plans or make a major commitment, find out what the documents allow and who must approve the design.

Start a conversation about your build

An HOA does not necessarily mean every home must look alike, and a custom design is not automatically exempt from neighborhood rules. Treat association requirements as one important part of early feasibility research, alongside the land itself and applicable government approvals. The most useful answer is not a general yes or no. It is a property-specific understanding of what is permitted, what needs review, and what remains uncertain.

Read more ...
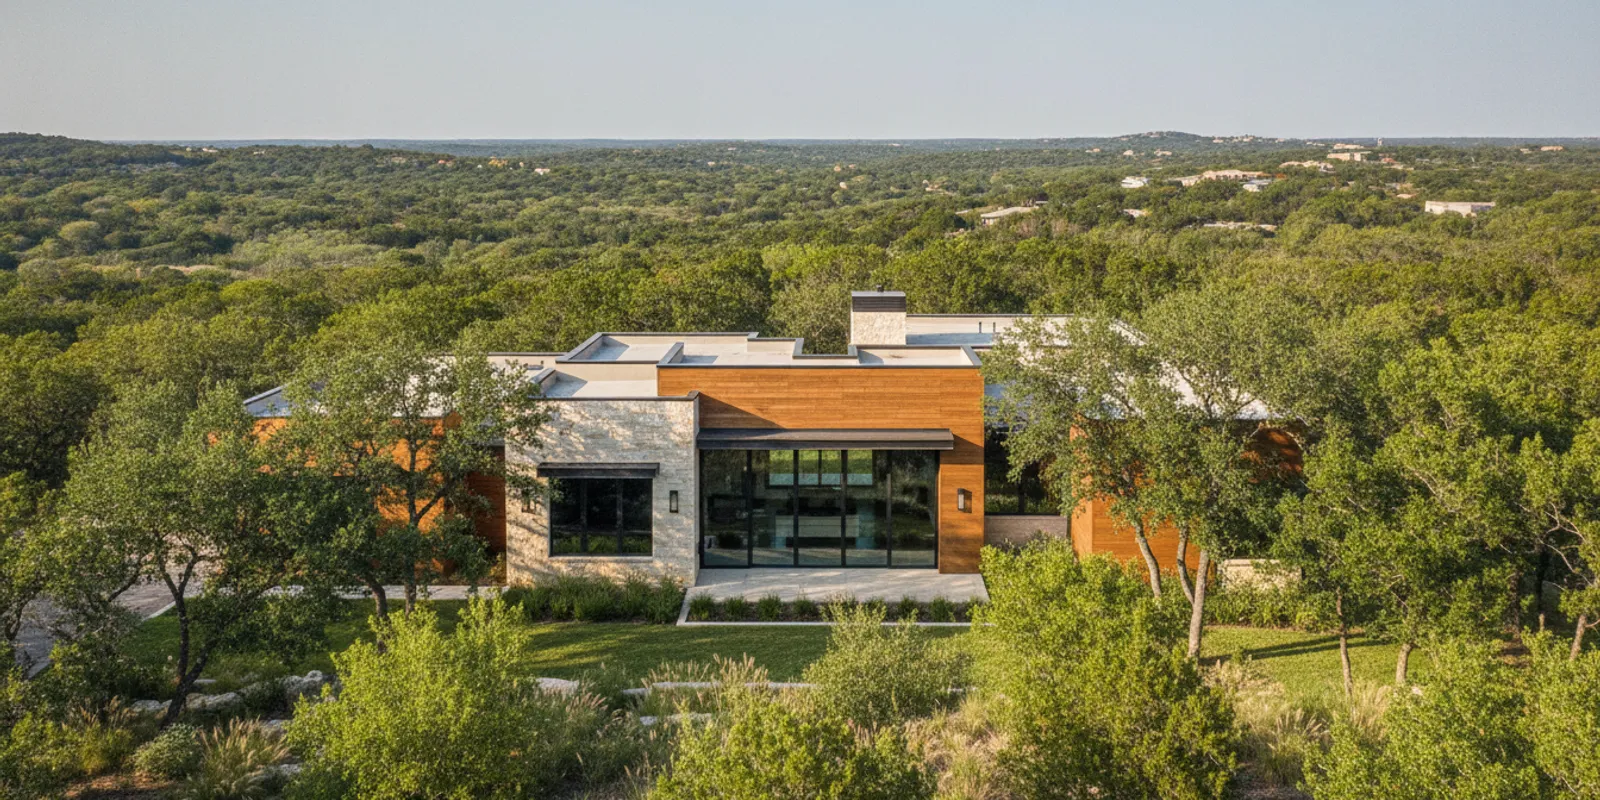
A wooded Texas Hill Country homesite with a gentle slope and distant limestone hills

Texas Hill Country Lot Due Diligence: A Buyer's Checklist Before Design Begins

Before you commit to a home design, use a Texas Hill Country lot due diligence checklist to look beyond a property's views. A lot may appear ready to build on, yet access, drainage, utilities, restrictions, and site conditions can shape what is practical. Review these items early, ask the right professionals to verify them, and keep written records of what you learn.

Talk with JLP about your lot

What should you confirm before treating a lot as build-ready?

Start with a simple rule: do not treat a listing description, a seller's recollection, or a visible utility line as proof that a particular home can be built on the property. Confirm each important detail with the appropriate source. That may mean a title professional, surveyor, civil or geotechnical engineer, utility provider, local permitting office, or septic professional, depending on the question and location.

Build a "lot file" with the property address or legal description, the latest survey you can obtain, recorded documents, written provider responses, maps, site photographs, and notes from calls. Record who gave each answer and when. If the answer affects whether you buy, where the home can sit, or how much site work may be needed, ask for written confirmation or an expert review rather than relying on an informal conversation.

Make the file easy to update. Use a short log with four columns: question, person or office contacted, evidence received, and next action. For example, if a utility provider says service may be available but needs a site review, record that as an open item rather than marking the service confirmed. Attach the response, note any promised follow-up, and identify who will request it. This small habit makes it easier to compare parcels and prevents tentative answers from becoming assumptions in a later design meeting.

Use this checklist during your option or feasibility period if your purchase agreement provides one, and ask your real estate or legal professional about the deadlines and rights in your contract. Do not assume that a due diligence period automatically gives you permission to enter, dig, test, or remove vegetation. Get the required permission first.

It can help to sort findings into three groups: confirmed, conditional, and unknown. A recorded easement shown in reviewed title materials may be confirmed for planning purposes, while a provider's statement that a connection is nearby may be conditional on capacity and approval. A question with no property-specific answer remains unknown. Keep those categories visible when you discuss the lot, because a list of unresolved items is more useful than a general impression that the property seems workable.

Does the lot have legal and practical access?

Confirm how the property connects to a public road and whether the access is legally documented. A visible driveway or a route across a neighbor's land does not, by itself, establish a permanent right to use it. Ask a title professional to identify recorded access easements and have the relevant documents reviewed if the route crosses other property.

  • Identify the road frontage and the location of any recorded access easement.
  • Confirm who maintains the road, private drive, or shared entrance, and whether there is a written maintenance agreement.
  • Ask whether emergency, construction, and delivery vehicles can reach the proposed building area. Have a qualified person assess width, grade, turning space, and surface needs.
  • Look for gates, drainage crossings, steep approaches, narrow sections, or other constraints that could affect access.
  • Clarify whether a new driveway connection or road approach needs approval from a road authority or other agency.

Access can affect more than convenience. Construction vehicles need a usable route, and the final driveway may influence where the house, garage, and outdoor areas can fit. Do not assume a route that works for a passenger vehicle will work for construction traffic. Ask your builder and the relevant road authority what needs to be checked before design proceeds.

Walk or drive the likely route, where access is permitted, and note the points where it narrows, changes grade, crosses a drainage feature, or passes through a gate. Photograph these locations from safe, permitted vantage points. A builder or qualified site professional can then consider whether the proposed route can serve deliveries and construction equipment, or whether an alternate route needs review. Do not widen, clear, or alter a shared road based only on a visual impression; first establish who controls it and what approvals or agreements apply.

Ask for the documents that explain ongoing responsibilities as well as the right to pass. An easement may establish access but not fully answer how upkeep, repairs, gates, or improvements are handled. If several owners use a private road, a written maintenance agreement may clarify obligations. Have a qualified professional review the language and identify any unanswered points before relying on it.

Where are the boundaries, easements, and usable building areas?

Request a current boundary survey when available, and ask a licensed surveyor whether it is suitable for the decisions you need to make. A survey can help identify property lines, visible improvements, and certain easements, but its scope matters. Ask what it shows and what it does not establish. Do not estimate a building location from a fence, tree line, or online map.

Review recorded easements and restrictions with the appropriate professionals. Utility corridors, access rights, drainage areas, and other recorded interests may limit where structures, driveways, fences, or other improvements can go. Some easements may not be obvious when you walk the property. Check the title documents and ask whether a survey should depict the relevant items.

  • Locate the proposed home area in relation to property lines and applicable setbacks.
  • Check easements, rights-of-way, and any recorded access or drainage areas.
  • Note existing wells, septic components, utility equipment, fences, and other improvements.
  • Ask whether the lot has boundary questions or encroachments that need professional resolution.
  • Verify whether any proposed driveway, pool, retaining wall, or accessory structure would conflict with a restriction or easement.

Do not assume that the entire acreage is available for a home simply because it appears open. The usable area may be smaller after considering boundaries, setbacks, easements, access, drainage, utilities, and site conditions. A builder can use verified information as design inputs, but legal interpretation and boundary determinations belong with the appropriate qualified professionals.

Ask the surveyor which version of the survey you have and whether it includes the detail needed for your next decision. A survey prepared for a different purpose or at an earlier stage may not show every item you need to evaluate a proposed building envelope. If you are comparing house locations, ask what additional field work, staking, or updated drawing might be appropriate. Avoid treating a seller's sketch, online parcel viewer, or approximate acreage as a substitute for professional boundary information.

It is useful to sketch a preliminary building envelope only after gathering the relevant constraints. Mark the likely home area, driveway approach, service routes, and any features you hope to retain. Then compare that sketch with survey and title information and ask a qualified designer or builder to flag conflicts. This is not a final site plan; it is a way to surface questions while changes are still manageable. If the envelope seems tight, pause before selecting a floor plan and ask which facts need resolution first.

Can the site support the home and driveway you have in mind?

Walk the property with attention to changes in elevation, exposed rock, trees, vegetation, low areas, and the route from the road to a potential building area. Photograph the site from several points and note the date and conditions. A casual walk is useful for spotting questions; it is not a substitute for a survey, soils evaluation, engineering, or other required assessment.

Ask qualified professionals whether additional evaluation is appropriate for the lot and proposed home. Slope, subsurface conditions, and the way water moves across the property can affect grading, foundation design, drainage planning, and site preparation. Avoid assuming that a neighboring home proves your parcel will have the same conditions. Nearby lots can differ, and prior work may have changed how water moves.

  • Look for steep grades, abrupt changes in elevation, exposed stone, or areas that may need specialized evaluation.
  • Notice where water appears to collect or flow after rain, and ask how drainage should be evaluated.
  • Identify trees or other features you hope to preserve, then ask whether they conflict with access or the building footprint.
  • Ask what information a designer, engineer, or builder needs before placing a home on the site.
  • Find out whether the proposed driveway and building pad require grading or retaining features, and who should estimate that work.

Keep early observations separate from confirmed findings. For example, a dry-looking low spot on a sunny day does not prove it never holds water. Likewise, visible rock does not tell you exactly what excavation will involve. Treat these as prompts for investigation, not conclusions or cost estimates.

Consider the full route from road to house, not just the likely building pad. A sloped driveway, a tight turn, or a change in elevation between the entrance and the homesite can influence how the site is arranged. Mark possible locations for the house, garage access, outdoor spaces, and utility runs on a preliminary sketch. Ask the design and construction professionals what information they need to assess that layout, and which parts should remain flexible until field evaluations are complete.

If preserving mature trees or a particular view is important, identify those priorities early. A preferred tree may sit within a potential driveway corridor, or a desired view direction may affect the building orientation. Share priorities with the design team as constraints to consider, not as a promise that every feature can be retained. A qualified site professional can help distinguish a preference that can guide the layout from a condition that requires technical review.

How will water move across and away from the homesite?

Drainage deserves attention before a floor plan is selected. Review the shape of the land and look for swales, culverts, ditches, low points, and signs of erosion or standing water. Ask the local permitting authority and qualified design professionals which drainage rules or studies apply to this parcel. Requirements vary by jurisdiction and project.

Check whether the property or a portion of it lies in a mapped flood hazard area, but do not rely on one map as a complete site assessment. Ask the local authority, insurance professional, and relevant technical experts how to verify the risk for the specific parcel and proposed building location. Confirm whether any flood-related permits, elevation information, or other reviews may apply.

  • Ask where stormwater from the roof, driveway, and graded areas may be directed.
  • Confirm that a proposed drainage plan will not redirect water onto a neighbor's property or block an existing flow path.
  • Look for drainage easements or culverts and confirm who is responsible for maintaining them.
  • Ask whether the property has documented drainage, flood, or erosion studies and whether they cover the intended building area.
  • Have appropriate professionals assess any signs of runoff damage, washouts, or recurring ponding.

Get answers before finalizing the site layout. Moving the home, driveway, or outdoor living areas later can require redesign and may alter site work. A qualified professional can explain which observations need further study and what decisions should wait until that study is complete.

Observe the property in more than one condition if you can do so safely and with permission. A visit after rainfall may reveal flow paths that are hard to see in dry weather, while a later visit can help show where water remains or where erosion is forming. Record what you observed and when, but do not treat a single visit as proof of the site's normal drainage behavior. Ask the appropriate professional how those observations fit with the topography, proposed grading, and applicable requirements.

Also consider water arriving from beyond the lot and water leaving it. The point where runoff enters, crosses, or exits a parcel may affect where a driveway or building can fit. Ask whether an existing swale, drainage easement, culvert, or other feature needs to remain functional. Do not plan to fill a low area, redirect a flow, or discharge water onto adjoining land without professional guidance and any required approvals.

Which utilities and wastewater options are actually available?

Verify each service with the provider or authority responsible for it. A line near the property is not proof of an available connection, sufficient capacity, an approved route, or a known connection cost. Ask for property-specific information and document any conditions the provider gives you.

  • Electricity: Ask the provider where service is available, what extension or equipment may be needed, and what steps are required for a connection estimate.
  • Water: Confirm whether a public water connection is available at the parcel. If a private well is being considered or already exists, ask the appropriate qualified professionals about permitting, testing, condition, and capacity.
  • Wastewater: Determine whether public sewer is available. If a septic system is needed, consult the local authority and a qualified septic professional about site evaluation, approvals, location, and ongoing requirements.
  • Internet and communications: Check directly with providers for service at the exact address, available connection methods, and any installation constraints.
  • Propane or other fuel: If relevant to your plans, confirm availability, tank placement requirements, and provider responsibilities.

Ask the provider what is included in any estimate and whether the amount depends on a site visit, easement, road crossing, trenching, or other work. Confirm the proposed route and who is responsible for permits and restoration. Treat an estimate as provisional if the provider says it depends on final design, approvals, or field conditions.

For each service, record the provider's exact answer and the next step. Ask whether the provider needs the legal description, survey, anticipated home location, load or demand information, or permission to inspect the site. A general availability map may be useful for initial screening, but follow it with a direct inquiry for the specific property. Ask whether a connection depends on capacity, extension work, a neighboring easement, or a road crossing. Those conditions can affect the route as well as the schedule and cost.

For a well or existing water system, do not assume that a visible wellhead or a neighbor's well answers questions about this parcel. Ask the relevant authority and qualified well professional which records, tests, inspections, or permits should be reviewed. For wastewater, establish whether the proposed home and site can meet the applicable requirements before treating a septic option as available. A septic professional can explain what evaluation is required, what information is needed, and whether the intended location should remain flexible during design.

Check communications at the place you expect to live and work, not just at the road or a nearby home. Contact providers and ask about installation, equipment placement, and any limitations at the address. Keep this question in its proper place: it may not determine whether a house can be built, but it can matter to daily use and may influence where equipment or service routes are planned.

What restrictions could affect the design?

Gather the recorded deed restrictions, covenants, easements, and any applicable association documents. Ask a real estate attorney or other qualified professional to help interpret language that could affect your plans. Check with the local permitting authority for applicable zoning, building, access, septic, drainage, and other rules. The responsible agencies and requirements vary from place to place.

Look for provisions that may address minimum or maximum home size, building location, exterior materials, roof form, fencing, accessory structures, short-term use, tree removal, or review and approval procedures. This is a list of questions to investigate, not an assertion that each restriction applies to every lot.

  • Who reviews plans, and what documents or fees are required before construction?
  • Are there architectural guidelines, design review steps, or approval deadlines?
  • Are there restrictions on building placement, exterior materials, fencing, or accessory features?
  • Do any recorded documents affect access, utility connections, drainage, or tree removal?
  • Are there ongoing association fees or responsibilities that should be included in ownership planning?

If you are considering a particular style or design feature, check its feasibility against the actual documents and applicable rules before assuming it is allowed. A restriction review belongs early in planning, not after design work is complete.

Collect the full documents, not just a brief summary in a listing or a verbal description. Check whether amendments, exhibits, or related agreements may apply, and confirm that the documents refer to the parcel you are considering. If a provision is unclear, write down the exact design question it raises and ask a qualified professional to interpret it. For example, a proposed detached structure, fence, or exterior finish may be treated differently under different documents. Do not assume a general statement about a community settles the rules for an individual lot.

It is also important to separate private restrictions from public approvals. A plan may satisfy one set of requirements and still need review under another. Ask the association or design-review body, if one applies, what its submission process involves, and ask the local office which permits or approvals it administers. Keep copies of responses and note any conditions or decision dates. Your real estate or legal professional can help you understand how these obligations relate to purchase and design decisions.

What should you learn about the surroundings?

Visit at different times if possible. Observe traffic, road noise, neighboring uses, lighting, and the general character of the area. Ask your real estate professional and local authorities about planned road work or land-use changes that may be relevant. Verify important information with the agency responsible for it; informal expectations about what will remain unchanged are not guarantees.

Consider how daily routines would work from the specific parcel. Think about the route to work, school, services, and other regular destinations without assuming travel times from a single visit. If you rely on cellular or internet service, test or verify coverage with providers at the site rather than relying only on broad coverage maps.

Also notice what you cannot determine during a visit. A quiet afternoon does not establish typical noise, and a dry-weather drive does not show how the road performs during heavy rain. Write down open questions and seek more information rather than allowing a first impression to stand in for verification.

Use a short visit log to compare the property under different conditions. Note the date and time, weather, traffic, access conditions, and any questions that came up. If you return with a builder or other professional, bring the same list so you can focus on unresolved items rather than repeat general observations. A neighbor's comments may provide useful context, but verify material claims with the responsible authority or a qualified professional.

Think through the arrival and daily-use experience as well as the view from the future living space. Consider how visitors would find the entrance, where vehicles might turn, and whether the route you expect to use is the route documented for the parcel. If a feature such as lighting, a gate, or a shared road matters to your household, determine who controls it and which records or agreements govern it. These practical details do not replace technical review, but they help you ask focused questions before making a commitment.

How should you compare site costs without mistaking estimates for a quote?

Ask for a written list of known assumptions and open items before comparing a lot with another property. Potential site-related expenses may include surveys, evaluations, driveway work, grading, drainage, utility extensions, well or septic work, tree clearing, and required permits. Which items apply and what they cost depend on the actual property, design, provider requirements, and professional findings.

Request that estimates distinguish confirmed scope from allowances or assumptions. Ask whether each estimate includes labor, materials, equipment, permits, taxes, and restoration, where relevant. Find out what could change the amount and when the work can be priced more reliably. Avoid using a generic per-acre or per-square-foot figure to decide whether a particular parcel is suitable.

It is also useful to keep land acquisition separate from home construction and site preparation in your planning notes. The overall decision is easier to compare when you know which items have been verified, which are estimates, and which remain unknown. For broader project planning, review JLP's custom home building process and ask what information is needed to discuss your property and plans.

A simple comparison sheet can keep several lots from blurring together. Give each property a row and list the same categories for every one: access, survey or title questions, drainage, site evaluation, utility status, wastewater, restrictions, and estimates. For each category, label the result confirmed, conditional, unknown, or not applicable. Add the source and date beside each answer. This does not make unlike parcels identical, but it helps you see whether one appears simpler because it has verified information or merely because fewer questions have been asked.

When you receive a number, ask what would cause it to change. A driveway estimate, for instance, may depend on the final alignment, grading, surface, drainage crossings, or access approvals. A utility estimate may depend on the provider's route and field review. Ask whether the figure is a preliminary allowance, a written provider estimate, or a defined scope from a qualified contractor. Keep those categories separate rather than treating every number as equally certain.

Consider the cost of unanswered questions in your decision, even when no reliable estimate exists yet. If a major item cannot be assessed before a contractual deadline, ask your real estate or legal professional what options are available under the agreement. Avoid deciding that the uncertainty is minor simply because it has not been priced. A written open-item list helps you identify which unknowns are acceptable to carry forward and which need resolution before you proceed.

What should you ask a builder before design begins?

Share the information you have gathered and ask what still needs professional verification. The goal is not to ask a builder to replace your surveyor, engineer, utility provider, septic professional, or attorney. It is to understand what information the design and construction team needs, how the open issues could affect the home concept, and which decisions should wait.

  • What site documents should I provide before discussing a building location?
  • Which unanswered questions could change the footprint, access, or site preparation?
  • Who should evaluate drainage, soils, utilities, and wastewater for this property?
  • What assumptions are being used in any early planning discussion?
  • When should I revisit the home design after receiving survey, utility, or site evaluation results?
  • How will the project team distinguish confirmed costs from provisional estimates?

JLP Builders offers a Build On Your Lot path for people planning a custom home on their property. Bring your questions and existing documents to a conversation, and clarify which next steps require independent professional advice or approval from a local authority.

Bring a concise summary rather than expecting a first conversation to resolve every technical issue. Include the parcel information, what you hope to build, your preferred areas for a home and driveway, and the questions already sent to providers or authorities. Point out which answers are written and which are still informal or pending. That makes it easier to identify what can inform early planning and what needs outside confirmation first.

Ask the builder to distinguish between a preliminary conversation and a site-specific conclusion. A builder can help explain how a slope, access route, or utility question may affect planning, but technical findings and approvals should come from the qualified people responsible for them. Ask who should take the next action and what information that person needs. Clear responsibility helps prevent an important question from being assumed to belong to someone else.

What belongs in your Texas Hill Country lot due diligence checklist?

Before design advances, review your lot file and make sure the major questions have an owner and a next step. A practical checklist can include:

  1. Confirm legal access, road responsibilities, and the route for construction vehicles.
  2. Obtain and review appropriate survey and title information, including boundaries and easements.
  3. Identify a potential building area, driveway route, and features that may need protection.
  4. Ask qualified professionals to evaluate terrain, drainage, subsurface conditions, and other site concerns.
  5. Verify electricity, water, wastewater, communications, and other services with their providers.
  6. Review recorded restrictions and confirm local approvals and permitting requirements with the responsible offices.
  7. Investigate flood and drainage questions for the specific parcel and proposed building area.
  8. Collect written, property-specific estimates and mark assumptions, exclusions, and unresolved items.
  9. Decide which open questions must be answered before purchase, design, or another contractual deadline.

Not every question needs the same professional, and not every answer will be available at the same stage. Prioritize the issues that could change whether the lot works for your plans. Keep the evidence with your records, and revisit provisional answers when the design or site information changes.

As you work through the list, give each open item a clear status and an owner. “Waiting for provider response” is more useful than “utilities TBD”; “attorney reviewing access language” is more actionable than “check easement.” Set a follow-up date where appropriate and keep the document or email that supports each finding. If the proposed home location changes, revisit any conclusions that depended on the old location, including utility routes, drainage, access, and septic planning.

Use a decision gate before design moves from broad ideas to detailed choices. Ask whether legal access is understood, the likely building area is consistent with survey and restriction information, required site evaluations are underway, and utility and wastewater options have been checked for the parcel. This is not a guarantee that every later condition is known. It is a disciplined point to identify remaining uncertainty, decide who will resolve it, and avoid presenting an unverified assumption as a settled fact.

Discuss your homesite with JLP

Frequently Asked Questions

When should I start lot due diligence?

Start as soon as you are seriously considering a parcel, and check your purchase agreement for any deadlines. Ask your real estate or legal professional how the contract affects inspections, access, testing, and cancellation rights. Important site questions are easier to address before you commit to a design.

Does a lot listed as buildable guarantee I can build my preferred home?

No. Listing language is not a substitute for checking legal access, setbacks, easements, restrictions, utilities, drainage, site conditions, and local approvals. Confirm the facts for the specific property and proposed home with the relevant professionals and authorities.

Is a neighboring home's site work proof that my lot will be similar?

No. Neighboring parcels may differ in boundaries, elevation, subsurface conditions, access, drainage, utilities, and prior improvements. A nearby home can offer context, but it does not establish the conditions or costs for your lot. Seek property-specific evaluations.

Can I choose a floor plan before evaluating the lot?

You can explore ideas, but treat them as preliminary until you know the lot's constraints and what local requirements allow. The building area, access, drainage, utilities, and restrictions may affect the size or placement of a home. Compare ideas with the verified site information before settling on a design.

Start a conversation about your build

A careful review will not remove every uncertainty, but it can reveal the questions to resolve before design decisions become harder to change.

Custom Texas Hill Country home set on a spacious homesite with trees and open land

How Much Land Do You Need to Build a Custom Home in New Braunfels?

The question “how much land do you need for a custom home in New Braunfels?” has no single acreage answer. The right homesite is large enough for the house you want, its required clearances, access, utilities and outdoor plans, and suitable for building under the rules that apply to that particular parcel.

A large parcel can still have a small or awkward buildable area. A more compact lot may work well when its shape, services and applicable requirements line up with your plans. Before making an offer, look beyond the acreage listed in a property description and find out how much land can realistically support your project.

Discuss your homesite and plans

How much land do you need for a custom home in New Braunfels?

Start with the site, not an assumed number of acres. There is no reliable one-size-fits-all acreage answer because home design, parcel layout, local requirements and land conditions all affect what can be built. A lot that works for a compact home and modest yard may not suit a wide one-story plan, extensive outdoor living space or a property that needs on-site wastewater treatment.

Think of land needs as two measurements:

  • Total parcel area: The full amount of land included in the property.
  • Usable area: The portion that can accommodate the home and features that matter to you, after constraints and required clearances are considered.

Those figures can be very different. Slopes, drainage paths, easements, protected or difficult-to-disturb areas, access routes and utility locations may affect where construction can happen. Shape matters too. A long, narrow lot may offer considerable area but limit the width or placement of a home. Treat acreage as an initial screening tool, not proof that a parcel is suitable. The practical question is whether this property can fit the home and site features you want while meeting the requirements that apply.

For scale, one acre contains 43,560 square feet, but that figure describes area, not a ready-made building pad. A square acre and an acre shaped like a long strip do not offer the same choices for positioning a house, driveway and outdoor areas. Even a seemingly generous parcel may include land that is not practical for building. Conversely, a smaller parcel with a favorable shape and connections may be worth examining if the proposed plan can fit and all applicable requirements can be met.

That is why broad rules such as “you need at least one acre” or “half an acre is always enough” can mislead. They do not account for the individual home, land, local jurisdiction, utility setup or intended use. Ask what the specific lot can support rather than treating a common acreage figure as a promise.

What needs to fit on the homesite besides the house?

It is easy to focus on rooms and forget the land the rest of the project needs. Make a list of the components you expect, then consider how they fit together rather than treating the house footprint as the only space requirement.

  • The home footprint: The ground-level outline, including wings, covered porches or an attached garage.
  • Required clearances: Distances from property boundaries or other features that local rules, recorded documents or approvals may require.
  • Vehicle access and parking: A driveway, circulation space and the parking arrangement you need.
  • Outdoor living: Patios, porches, a pool, play space, gardens or room for future additions.
  • Site services: Locations for utilities and, where applicable, private water or wastewater systems.
  • Drainage and grading: Space to manage water and shape the building area without creating problems for the home or neighboring land.
  • Construction access: A practical way for equipment and deliveries to reach the building area.

Not every property needs every item. Some lots connect to public services; others need site-specific solutions. Some buyers want a generous lawn, while others would rather preserve natural landscape. Make your priorities explicit before deciding whether a parcel is large enough.

It also helps to separate fixed requirements from preferences. The house, legal access, necessary services and required clearances determine whether a plan can be considered at all. A pool, detached workshop, large garden or second driveway may be optional, but each can change the layout. Identify which features must fit on day one and which could be reduced, relocated or added later.

Consider how the parts work as a system. A driveway that reaches the garage may use the same portion of the lot you hoped to reserve for a front garden. A patio may be more useful beside the main living area than at the far side of the house. Utility placement and wastewater areas can also affect where future improvements might go. A site sketch should show the house and supporting pieces together, not as separate wish-list items competing for space.

How do your home design and layout change the land you need?

Two homes with similar interior area can sit differently on the same parcel. A broad, single-story design generally occupies more ground than one that places some living space on another level. A garage wing, courtyard, covered outdoor room or long porch can change the footprint. The driveway approach and the rooms you want to face toward views or outdoor spaces can shape placement too.

Evaluate a floor plan as a shape, not only by its square-foot figure. Compare its overall footprint and proportions with the site. A wide plan may be difficult to place on a narrow parcel, even if the total acreage sounds substantial. A compact footprint may leave more flexibility for a garden or outdoor living area. You can review JLP Builders’ available floor plans for ideas, but any plan still needs to be considered against the dimensions and conditions of the actual lot.

Sort your wishes into three groups:

  1. Must fit: The home, garage, required access and essential site services.
  2. Strong preference: Features such as a pool, workshop, large patio or gardening space.
  3. Could change: Optional features whose location, size or timing could adjust to suit the lot.

This gives a designer and builder something specific to test. Keep flexibility until you understand the property, rather than committing to a home shape that may not work with it.

Make the home brief concrete enough to compare with a parcel. You do not need a final plan to begin asking useful questions. A short list can describe a one- or two-level preference, approximate footprint, garage arrangement, covered outdoor areas and important room orientations. Include practical details such as a separate work area or space for storage if those will affect the shape. A plan with a broad garage wing may call for a different lot width than a more compact arrangement, even if the total floor area is similar.

Think through at least two versions of the idea. For example, a family may prefer a single-level layout but be willing to consider a narrower footprint or a different orientation if the parcel is constrained. Another buyer may prioritize a large covered patio and accept a smaller lawn. Those tradeoffs do not guarantee that a lot will work, but stating them helps a professional evaluate more than one possible arrangement.

For a visual check, ask for a preliminary site layout using the actual parcel boundaries and a representative house footprint. It should consider access and known constraints, not merely place a rectangle in the middle of a listing map. A preliminary sketch is a screening tool, not a survey, permit, engineering document or final approval. Its value is that it can reveal obvious conflicts early and show which questions still need answers.

Which lot conditions can reduce usable land?

Land area alone does not reveal how straightforward a homesite will be. A parcel can have more acreage than you expect to need and still present siting or preparation questions. Identify what is known and what needs professional review.

Slope and changes in elevation

Sloping ground can influence the position and design of a home, driveway and outdoor spaces. Depending on the site and design, it may require grading or a different foundation approach. Ask whether a survey or other information shows elevations, and have qualified professionals assess the proposed project. Do not assume that a gentle-looking slope needs no additional work, or that a dramatic slope makes building impossible.

Walk the land, if access is available, with the survey or a reliable site plan in hand. Notice where the ground rises and falls, how those changes relate to a possible driveway and where a level outdoor area might fit. A photo taken from the road may conceal changes farther back on the parcel. Ask what additional topographic information would be needed to test a home location. The point is not to diagnose the site yourself; it is to spot questions before you rely on a simple acreage description.

Drainage and water movement

Notice where water flows after rain and whether low areas, channels or drainage features cross the property. The building location should be considered in relation to water movement and how it can be managed. Ask what drainage information is available and whether more evaluation is needed. A site plan should consider the home, grading and water together.

Do not assume that a low portion of the land can serve as an easy place for a future feature without review. Drainage routes may affect how the site can be laid out, and changing how water moves can have consequences beyond the building footprint. Ask what existing documents, observations or professional evaluations can clarify the issue. If the answer is uncertain, note it as an open item rather than counting that area as usable.

Soil and ground conditions

A parcel’s appearance does not tell you everything about its soil or subsurface conditions. Ask what site investigations are appropriate for the planned home and who will review results. Answers should be specific to the property; assumptions drawn from another lot are not a substitute for evaluating this one.

Soil and subsurface questions can affect both the placement and preparation of a home. A buyer should ask which evaluations are appropriate, at what stage they should happen and whether the results could change the preliminary layout. Do not treat a neighbor’s experience as a conclusion about the parcel you are considering; conditions can vary from one location to another.

Easements, restrictions and services

Recorded easements or deed restrictions may limit where structures, driveways or improvements can go. Other site constraints may also need to be identified. Review the survey and relevant property documents, and ask the appropriate local or professional contacts to explain restrictions that could affect your plans. Also confirm how electricity, water and other services are provided and whether the parcel can connect to what you expect to use.

An easement does not necessarily mean that the entire area is unusable for every purpose, but it can affect structures and future plans. Do not infer what is permitted from a line on a map or a neighbor’s use. Identify the document that creates the restriction and ask the appropriate professional or authority how it applies to the proposed project. Similar care applies to private restrictions, which may address placement, design or other property uses.

If on-site wastewater treatment is needed, feasibility, system placement and applicable clearances can affect the layout. Confirm requirements with the relevant authority and qualified professionals before treating any section of land as available for other uses.

Services deserve their own due-diligence questions. Ask whether the property has access to the connections you expect, where those connections are and what work or approvals may be required. A line near the property does not by itself prove that a connection is available or suitable. For any private water or wastewater arrangement, verify the options and constraints for this lot with the relevant authority and qualified professionals.

What should you verify before buying a lot?

Do not rely only on a listing description, rough map measurement or seller’s estimate of where a home could go. Make land due diligence part of the purchase decision. Checks depend on the property and jurisdiction, so confirm requirements with the relevant local authorities and qualified professionals.

  1. Confirm parcel boundaries. Request and review a current survey, if available. Check lot dimensions, shape, access and easements shown on it.
  2. Ask which rules apply. Find out which city, county or other authorities have jurisdiction and ask about relevant development, building and site requirements. Do not assume that nearby properties have identical rules.
  3. Check recorded restrictions. Review title documents and applicable deed or community restrictions for limits on structures, placement, use or design.
  4. Investigate services. Confirm available utility connections, their locations and what is required if a private system is needed.
  5. Review site conditions. Ask whether topographic, drainage, soil, wastewater or other evaluations are appropriate before you commit.
  6. Test a preliminary layout. Consider the proposed home footprint alongside access, clearances, services and outdoor features.
  7. Understand budget implications. Ask what site preparation or infrastructure may be needed. The parcel’s purchase price does not tell you the full cost of making it ready for a home.

Keep a written record of open questions, who is responsible for answering each one and any deadlines tied to the purchase. If an answer is not verified, treat it as unknown rather than assuming the most favorable outcome.

A useful due-diligence file can be simple. Save the listing, survey, recorded restrictions, utility responses and any professional observations in one place. Beside each document, note its date and what it does, and does not, confirm. A survey can help establish dimensions and show certain recorded features, for example, but it does not by itself answer every question about approvals, utilities, soil or drainage. Distinguishing the evidence from the remaining questions keeps an early review from becoming false certainty.

Before an offer or purchase deadline, identify which checks must happen within that window and whether the contract gives you time to complete them. The appropriate process depends on the transaction and legal advice should come from a qualified professional. The practical lesson is to avoid leaving important feasibility questions until after you are committed if you can investigate them earlier.

A practical question list for the seller or listing contact

  • Is a current survey available, and does it show access, easements and dimensions?
  • What utility providers or service arrangements are known for the parcel?
  • Are there recorded restrictions, association documents or approvals a buyer should review?
  • Has any site, drainage, soil or wastewater evaluation already been completed, and can the documents be shared?
  • Which authority should a buyer contact to confirm the rules that apply to this address?
  • Are there known access agreements or shared improvements that affect the property?

Answers from a seller or listing contact are useful leads, but they are not a substitute for documents and confirmation from the relevant source. Treat verbal statements as items to verify. If an answer cannot be documented, keep it on the open-question list.

How can you compare two New Braunfels-area lots?

When two parcels have different acreage, it is tempting to choose the larger one. Instead, compare what each can support and what it may take to prepare it. A side-by-side worksheet can bring practical differences into view:

  • Does the survey show a shape and width that can work with your preferred home?
  • How much area appears usable after known boundaries, easements and restrictions are considered?
  • Can you reach the building area, and can the driveway work with the intended placement?
  • What is known about slope, drainage and soil, and what still needs assessment?
  • Which utility and wastewater arrangements are possible, and who has confirmed them?
  • Can the site accommodate outdoor spaces and future flexibility you care about?
  • What site-preparation questions remain, and could they change your budget or design?

Use the same home concept and priorities to evaluate each parcel. If one lot is larger but has unanswered questions while another has a more workable layout, acreage alone does not settle the comparison. A builder’s early review can help identify questions to investigate, but it does not replace surveys, approvals, engineering or other required professional assessments.

For buyers considering a client-owned homesite, JLP’s Build On Your Lot information offers a starting point for understanding the path. Discuss the particular parcel and home you have in mind rather than assuming every lot will suit every design.

To make the comparison concrete, give each property the same short profile: parcel dimensions, documented constraints, likely service arrangement, known site conditions, preferred building area and remaining questions. Then compare each one against the same house concept. If one candidate accommodates the home and outdoor priorities only after major changes, while another seems to fit but lacks verified service information, record both tradeoffs rather than forcing an early winner.

It can be helpful to classify each issue as confirmed, under review or unknown. “Confirmed” should mean you have appropriate documentation or an answer from the responsible source. “Under review” means an evaluation is underway. “Unknown” means no reliable answer is available yet. This avoids treating a hopeful guess as a fact. It also shows which parcel carries more unresolved risk and which questions deserve attention first.

Do not assign a simple score that hides important differences. A lot with a favorable shape but a significant unresolved wastewater question may not be interchangeable with one that has a different outdoor layout but verified service information. Some criteria are preferences; others may be gating requirements. Separate them so an attractive acreage number does not outweigh a basic feasibility issue.

How do you keep land selection aligned with your budget?

A sensible land decision considers more than the purchase price. Site preparation, access, utility connections and design changes can affect the total project, and the scope varies by property. Avoid relying on a generic per-acre or per-square-foot estimate to predict what a specific site will require.

Before settling on a parcel, identify the assumptions behind your budget. Which services are confirmed? Which site evaluations are complete? Is the home concept fixed, or could it adjust to suit the property? Are there improvements you can phase later? If key answers are missing, leave room for uncertainty until qualified professionals assess the site.

Be cautious about committing to a design before you understand the lot, or buying land solely because it appears to fit a preferred plan. A preliminary site review may show that a different orientation, footprint or outdoor layout works better. It can also surface issues to resolve before a purchase or design commitment.

A useful way to discuss uncertainty is to divide the work into known items, likely items and unresolved items. Known items might include the documented parcel dimensions or a confirmed connection arrangement. Likely items could be work a qualified professional expects to evaluate but has not yet scoped. Unresolved items may include the feasibility of a particular layout or the extent of site preparation. This is not a cost estimate; it is a way to prevent unknowns from disappearing from the conversation.

Ask which decisions are reversible and which are not. A patio size may be adjustable during design; the parcel boundary is not. A house orientation may change before plans are finalized, but the purchase decision can be difficult to undo. Put early attention on the questions that could eliminate a lot or force a major redesign. That is usually more useful than refining optional features while the property’s basic fit is uncertain.

Keep contingency discussions tied to the actual site and scope. A broad reserve percentage or a generic estimate cannot predict the conditions of an individual parcel. Ask qualified project professionals what has been examined, what assumptions remain, and when a more informed estimate may be possible. Avoid treating preliminary numbers as a guaranteed quote.

For help thinking through how a homesite relates to a custom-home concept, start a conversation with JLP Builders. The goal at this stage is to describe your property, priorities and open questions so you can determine what needs review, not to assume that every acreage or layout will be suitable.

Talk with JLP Builders about your lot and plans

Frequently Asked Questions

Is one acre enough for a custom home near New Braunfels?

It may be enough for some projects, but acreage by itself cannot confirm that a parcel is suitable. Lot shape, buildable area, local requirements, access, site conditions, utilities and wastewater needs all matter. Have the specific property reviewed against your home and outdoor plans before relying on a general acreage rule.

Can I build on a small lot if the home has a compact footprint?

A compact design may make some smaller lots worth evaluating, but the home still needs to fit with required clearances, access, services and applicable restrictions. Confirm the parcel’s dimensions and requirements, then test a preliminary layout. A smaller footprint does not automatically make a lot buildable.

Does more acreage always make building easier?

No. A larger parcel may have slopes, drainage features, easements, service limitations or other conditions that affect where and how a home can be built. More land can provide options, but only site-specific review can clarify how much is useful for your project.

Should I choose a floor plan before buying land?

It helps to know the kind of home you want, including its general footprint, garage and outdoor-living priorities. Keep some flexibility until you understand the parcel. Reviewing the lot and home concept together can help you avoid land that conflicts with your preferred layout.

Who can tell me whether a particular lot is buildable?

No listing or general acreage guideline can confirm that. Start with relevant local authorities for applicable requirements and consult qualified professionals for surveys, site conditions, utilities and design. A builder can discuss how a home concept may relate to a lot, while formal determinations and technical evaluations should come from appropriate sources.

Contact JLP Builders to discuss your homesite

A well-chosen homesite is not simply the one with the most acreage; it is the one whose usable area, conditions and requirements work with the home and outdoor life you want to create. Taking time to check the property before you buy can help you make a clearer, more informed decision about your New Braunfels custom-home project.

Covered patio with comfortable seating beside a Texas Hill Country custom home

Texas Hill Country Outdoor Living Custom Homes: Covered Patio Design

Outdoor living can make a Texas Hill Country custom home feel connected to its site, but the best plan begins with how you want to use the space—not with a particular patio shape or finish. When people ask about Texas Hill Country outdoor living custom homes, the practical question is how to connect daily routines with covered space, views, drainage and easy access from indoors. A good starting point is a clear description of what you want the outdoor rooms to do through an ordinary week, not only on a special occasion.

Start a custom-home conversation

What should outdoor living do for your household?

Begin by listing the activities you want the outdoor space to support. A patio used for quiet morning coffee has different needs from one used for family dinners, weekend gatherings or grilling. Decide which activities matter most, who will use the space, and how often. This simple exercise helps you allocate space and make design decisions with purpose. It also helps distinguish essentials from attractive extras that may not improve the way you actually live.

Try writing a short list under three headings: everyday use, occasional use and future flexibility. Everyday use might include sitting outside before work, reading after dinner or sharing a weeknight meal. Occasional use might mean hosting relatives or inviting a larger group over. Future flexibility could mean leaving a clear area that can accommodate different furniture later. The goal is not to plan for every imaginable use. It is to identify the few patterns that should shape the design.

Make those notes specific. Instead of writing “entertaining,” describe a typical gathering: how many people might sit at a table, whether food is served outside, and whether guests move between the patio and the yard. Instead of writing “relaxing,” note whether you picture two chairs in a quiet corner or a larger lounge arrangement that faces a view. These small details turn a broad preference into useful information about circulation, placement and area.

Then think about the relationship between indoor and outdoor rooms. If you expect to carry meals outside, a route from the kitchen or dining area can matter more than a distant view. If the patio is primarily a quiet retreat, a connection to a bedroom or a more private side of the home may make more sense. Consider doors, circulation, furniture and the way people will pass through the space before settling on its dimensions.

Walk through a normal routine mentally, step by step. Imagine carrying a tray from the kitchen, opening the door, passing seated people and reaching the table. Picture someone coming in from the yard while another person is serving food. If those paths overlap, the layout may need a wider transition or a different arrangement. A little planning on paper can catch a daily inconvenience before the patio is built.

Also consider who will use the space at different times. A household may want a lively place for meals and a quieter spot for conversation. A visitor may need an unobstructed route from the house to a seat. Someone carrying groceries or dishes benefits from a direct path that does not weave around furniture. You do not need to create a separate area for each person; just note when several activities could happen at once and avoid making one route serve as everybody’s only usable space.

How should a covered patio fit the Texas Hill Country site?

A roof can make a patio more usable by creating shade and shelter, but its placement and depth affect light, views and the rooms next to it. Consider the sun at the times you expect to use the patio. Morning, midday and late-afternoon exposure can feel very different. A covered area may help with direct sun, while a carefully placed open-air section can preserve sunlight or a view. Ask your design team to consider the house and outdoor areas together rather than treating the patio as a leftover space.

When possible, visit or observe the property at more than one time of day. Note where direct sun falls, which views draw your attention and where shade already exists. If you cannot visit at different times, write down the questions rather than assuming a single visit tells the whole story. The design conversation can then test the patio’s orientation against the times you are most likely to use it.

Orientation should be considered alongside the lot’s slope, existing trees, neighboring homes and the views you want to keep. On a sloped site, a patio that works on paper may require a different transition from the house or a careful approach to grading. Existing trees may offer useful shade, but their location and condition should be assessed before the home’s footprint is fixed. A view may be strongest from one part of the lot, while privacy may favor another. These are site-specific questions, not assumptions to make from a floor plan alone.

Think about the view from inside as well as from the patio. A roof edge, column or outdoor structure can become a prominent part of what you see through a large window or door. The same feature that frames an outdoor seating area may interrupt a long view from the living room. Ask to review both perspectives: the outward view while standing inside, and the home’s appearance from the yard. This helps the outdoor room feel intentional from either side.

Think about the roof as part of the home’s architecture. A covered patio can feel integrated when its proportions, roofline and materials relate to the main house. It can also create a distinct outdoor room through a change in ceiling finish, lighting or furniture arrangement. Discuss how the covered area will look from indoors and from the yard. Both views matter, especially when large openings make the patio a visible extension of the interior.

A covered area and an open-air area do not have to compete. One can provide shade near the house, while the other can leave room for an unobstructed sky view, a sunny seat or a different furniture arrangement. A transition between them can be as simple as a change in paving or a shift in how the furniture is placed. Think through how people move between those parts so that the uncovered area feels connected rather than like an isolated patch beyond the roof.

Do not choose roof depth by appearance alone. Ask what the planned roof is expected to shade and how it affects the doors, windows and rooms beside it. A shallow overhang may look balanced but provide a different experience from a deeper covered room. A larger roof may create more protected space but also alter daylight indoors and the view upward from the yard. The appropriate choice depends on the actual design and site; compare sketches or elevations with the sun and daily routine in mind.

Which outdoor zones belong in the plan?

Divide the outdoor area into zones only when each one serves a clear purpose. A dining table needs room to move chairs and pass behind seated guests. A lounge area needs a comfortable arrangement and circulation that does not cut through the seating. A cooking area should be considered in relation to the kitchen, table and path to the yard. These zones do not need walls between them. Furniture placement, lighting and a change in paving can help define them.

  • Dining: Plan for the table, chairs, serving space and a clear route back inside. Check that chair movement will not block a doorway or a main walking path. Think about where a person will stand to serve a meal, too, rather than drawing only the table footprint.
  • Lounge: Arrange seating around a view or a focal point. Leave room to walk through without squeezing between furniture. Consider whether the conversation area should be close to the dining space or slightly apart from it.
  • Cooking: Consider how food, utensils and dishes will travel between the indoor kitchen, cooking equipment and dining area. Keep circulation in mind before choosing locations. A useful plan avoids making the cook cross the main path between the house and the yard.
  • Open-air space: A portion without a roof can preserve sky views and provide a different experience from the shaded patio. Place it where it complements, rather than interrupts, the main gathering area.
  • Transition: Give the route from the home to the yard enough attention. A direct, uncluttered path can make the outdoor room feel easier to use. Include any change in level in the early conversation.

Not every home needs all of these zones. A compact, well-organized patio can be more useful than a larger area divided into spaces that rarely get used. Bring a rough furniture plan to design discussions. Even approximate dimensions for a table, chairs or lounge pieces can reveal whether paths are too narrow or whether two functions compete for the same area. Use actual pieces you already own when possible, or mark likely furniture dimensions on a sketch.

Consider the route between each activity, not just the activity itself. For outdoor dining, the table is only one part of the plan: people also need to sit down, move their chairs, serve food and reach the door. For a lounge area, test whether a person can reach a seat without walking between the center of a conversation group. For an outdoor cooking setup, picture where prepared food lands and where used dishes go. Those practical movements help establish whether zones can share space comfortably.

There is value in a flexible area, but flexibility does not mean leaving every decision vague. Decide what must be fixed—such as the route from a door or the main covered area—and identify what can remain changeable, such as movable chairs or the exact location of a small table. If a large gathering is occasional, furniture that can be rearranged may be more useful than dedicating permanent space to a rare use. The plan can provide options without asking the home to accommodate every possible scenario at once.

Think about sound and sight lines, too. A cooking or dining area may be an active part of a gathering, while a reading chair may work better where foot traffic is lower. Place seating so people can look toward one another or toward the view they value. If the patio is visible from the main living space, consider how furniture and planting will appear through the windows. This is not about decorating every corner; it is about making the connections between zones feel considered.

How do materials and style choices work together?

Outdoor finishes should suit the architecture and the practical demands of the site. Consider how paving will feel underfoot, how it connects to the interior and whether its color and texture complement the home. For wood, masonry or other exposed finishes, discuss how the material will weather and what care it may need. Ask how transitions between indoor flooring, covered patio surfaces and open-air paving will be handled so they look intentional and are comfortable to navigate.

JLP’s local style vocabulary includes Transitional, Farmhouse, Modern Farmhouse, Contemporary and Spanish Style. Each can inform an outdoor room without requiring it to mimic an interior. For example, a clean-lined patio may suit a Contemporary approach, while a warm material palette can support Farmhouse character. The important choice is consistency: roof shape, columns, trim, lighting and paving should feel related to the home rather than collected as unrelated features.

Translate a style preference into a few visible decisions. If you like a restrained, contemporary look, you might focus on clean roof lines, simple paving patterns and fixtures with a similar visual character. If you prefer Farmhouse or Modern Farmhouse, you might discuss how warm surfaces, trim and the covered ceiling relate to the home’s exterior. For Spanish Style, consider how the patio’s forms and materials coordinate with the home rather than adding decorative elements without a connection to the overall design. These are prompts for discussion, not a fixed recipe for any style.

Color is part of that coordination. Compare samples in the outdoor light where possible, and look at them beside the exterior materials. A finish that appears subtle indoors can look brighter in direct sun. Also consider how the patio will look from the main living spaces. Repeated materials or a restrained palette can make the view feel cohesive without making every surface identical.

Ask to see samples together rather than making each selection in isolation. A paving sample, exterior finish, trim color and ceiling material may all look appealing alone but feel unrelated side by side. Lay out the samples in the order a person experiences them: from interior floor, through the threshold, to the covered area and out to the yard. This makes transitions easier to assess and can help you decide where a material change is useful.

Surface texture and upkeep deserve the same attention as appearance. Ask how an exposed material is expected to age and what ongoing care is appropriate. Consider whether leaves, dust or water are likely to collect in a particular location and whether the finish is practical for that use. Avoid selecting an outdoor surface solely from a small showroom sample; ask how it will read across a larger area and in the natural light of the site.

Finally, consider the ceiling and edges of the covered space. Because these surfaces sit within the view from the house and from the seating area, their finish can influence the whole impression. A ceiling treatment, column detail or trim transition need not be elaborate to make the patio feel complete. The goal is to carry a coherent design language outdoors while choosing materials suited to the conditions they will face.

What should you plan for lighting, power and comfort?

Plan lighting around activities and movement, not just around the ceiling. A combination of general illumination and focused light can support dining, conversation and safe circulation. Think about entrances, steps and transitions as well as the center of the patio. Discuss fixture placement early enough to coordinate it with the roof design and other construction details.

Make a simple lighting map. Mark the main door, the dining surface, the lounge area and any change in level. Then ask where people need to see clearly and where a softer atmosphere is preferable. A fixture positioned only over the center of a covered area may not address the doorway or a path along the edge. The map makes it easier to talk about layers of light without prescribing a particular fixture or technical solution.

Consider how lighting will look from inside after dark. Fixtures in direct view through a window may create glare or draw attention away from the outdoor scene. Ask the design team to review both the light cast on the patio and the view back toward the house. Lighting can help distinguish a dining area from a lounge area, but it should support the overall experience instead of making every part equally bright.

Make a list of likely electrical needs. These may include charging a device, using small appliances or powering future outdoor equipment. The list is a planning prompt, not a promise that every location or device is suitable; your builder and qualified trade professionals can advise on the appropriate design. It is easier to discuss where power may be useful before finishes and surfaces are complete than to discover a missing need later.

Be concrete about how you expect to use power. If you might use a small appliance near a serving area, identify the approximate location and whether a person would need to cross a walking path to reach it. If you expect seasonal equipment or a future addition, note that as a possibility and ask which decisions need to be made now. Do not assume that an outlet belongs in a particular spot or that every outdoor device can be used in every condition; ask the appropriate professional to evaluate the plan.

Comfort also depends on shade, airflow, furniture and how the patio faces the yard. Observe the site at different times if you can, and note where sun or prevailing breezes seem to matter. Do not assume a roof alone will solve every comfort concern. Ask the design team how the opening size, orientation and surrounding landscape relate to the way you plan to use the space.

Think about furniture as part of comfort, not as a finishing detail to solve after the layout is fixed. A dining chair needs room to move, and lounge furniture needs an arrangement that supports conversation without blocking the path. If you already have pieces you plan to use, share their approximate size. If not, sketch a likely arrangement and leave enough room to test alternatives as the design develops.

Landscape and hardscape also shape the experience at the patio edge. Discuss whether the transition to the yard should be open, planted or defined by a path. Consider how those features may affect shade, views and privacy over time, while asking which choices depend on site review. The landscape should support the intended use without obscuring a view you value or sending foot traffic through the seating area.

What site questions should you resolve before finalizing design?

Outdoor plans are closely tied to the lot. Before committing to a patio footprint, identify what needs to be understood about grading, drainage, access and existing site features. Water should be directed away from the home, and paving and roof runoff need to be considered as part of the overall site plan. The right response depends on the property, so avoid treating a generic sketch as a site assessment.

Bring these questions into early conversations:

  • Where are the best views, and which areas need greater privacy?
  • How does the lot slope near the planned home and outdoor space?
  • What existing trees or landscape features should be evaluated before placement is set?
  • How will roof runoff and patio drainage be addressed?
  • Where will people enter the patio, and how will they move between the home, seating and yard?
  • Which features are priorities now, and which could reasonably be left for a later phase?
  • Are there known access or site constraints that should be reviewed before the footprint is fixed?
  • How will the patio relate to neighboring homes and the privacy you want?

Drainage deserves particular attention because several parts of the plan meet at the house: roof runoff, paved surfaces, grade and the path to the yard. Ask how these elements will be considered together. Do not infer a solution from a photograph of another property or from a generic drawing. A professional review of the specific lot is necessary to determine how site conditions affect the design.

If you already own land, share what you know about it and ask what additional review is needed before design decisions are finalized. If you are still looking for a homesite, use your outdoor-living priorities as a way to assess whether a property may support the kind of space you have in mind. A preferred view, usable yard, privacy and the location of the house all interact; none should be assumed from a listing image alone.

When considering a property, separate what you can observe from what needs confirmation. You may be able to identify an appealing view, a slope, trees or nearby structures during a visit. You cannot determine from appearance alone how grading or drainage should be resolved, whether a tree can remain, or what limitations may affect the planned footprint. Make a list of observations and questions, then request the appropriate site-specific review before treating an idea as a design decision.

Pay attention to the approach from the home as well as the patio itself. If the route crosses a narrow side yard, changes level or turns around a wall, include that in the discussion. If people will reach the outdoor room from more than one door, note which entrance should feel primary. The approach can influence where furniture belongs and whether a direct view to the yard should be preserved. It is easier to consider access with the larger site plan than to squeeze a path in after the seating footprint has been chosen.

Existing landscape features can be valuable, but their role should be evaluated rather than assumed. A tree may give shade or frame a view; it may also affect where the home or patio can sit. A low area may look attractive but raise a drainage question. Bring photos and a simple marked-up site sketch if available, clearly identifying what you know and what you are unsure about. That makes early conversations more precise without treating a homeowner’s observations as a substitute for professional review.

How can you compare design choices before committing?

Write down your priorities, then compare each option against them. A simple decision table can keep the conversation focused and show where trade-offs exist. It is most useful when you use it to ask better questions rather than to select a solution without site and design review.

Design choiceQuestions to askBest fit when
Fully covered patioHow will the roof affect shade, daylight, views and the rooms next to it?You expect to use the space often and want a sheltered outdoor room.
Partly covered patioCan covered and open areas connect without interrupting circulation?You want both shade and an open-air area for sun or sky views.
Dining-centered layoutIs there enough space for chairs, serving and a clear path indoors?Outdoor meals are a central part of how your household gathers.
Lounge-centered layoutCan seating face a view or focal point without blocking movement?Relaxing and conversation are higher priorities than outdoor dining.
Phased featuresWhich site, structural or utility decisions need to be resolved now?You want to prioritize essential planning while keeping some additions flexible.

Use the table to surface questions, not to make a site-specific decision without the appropriate review. For each choice, note what matters most: daily use, shade, views, access, maintenance or flexibility. When two priorities compete, discuss the trade-off directly. For example, a covered roof may improve shade but change daylight or the view from inside. Understanding that tension early is more useful than choosing a feature simply because it appears in another home.

You can make the comparison more useful by adding a short “must have / would like / optional” list. A must-have might be a direct route from the dining area or enough room to sit outside under cover. A would-like feature could be an open area for a view or a separate lounge arrangement. An optional item might be something you would consider if it fits the site and overall plan. These categories do not determine what is possible; they help the design discussion start with your priorities.

Next, compare choices against the same everyday scenario. Imagine a weeknight meal, a quiet morning and a gathering with several visitors. Does the same patio arrangement support all three? If not, decide which use should lead and where flexibility matters. A layout that performs well for the routine use may be more valuable than one that is optimized for a rare event. If you expect to rearrange furniture for larger gatherings, make sure the paths remain clear in both arrangements.

Ask what information would change your preference. You may favor a deeper roof until you see how it affects daylight in a nearby room. You may prefer a dining-centered layout until a site sketch shows that another location offers a more direct route from the kitchen. Stating the reason behind a choice helps the design team test it. It also gives you a clear way to revisit the choice if new information about the lot becomes available.

Finally, record decisions and open questions separately. A note such as “keep the view from the living room; confirm roof placement against afternoon sun” is more actionable than “patio should feel open.” Keep a small list after each design conversation: what was decided, what remains unresolved and who needs to provide the next piece of information. This simple practice prevents a preference from being mistaken for a confirmed site or technical decision.

How can you review a patio sketch before design details are fixed?

A sketch is useful when it helps you test how the space works, not only how it looks. Start by locating the house, the patio edge, doors and the route to the yard. Add the activities you identified earlier, then draw the approximate furniture shapes. Include the path people will take from the kitchen or dining room, the door swing where relevant, and space to pull out chairs. This rough plan makes circulation visible and exposes conflicts that can be hard to spot in a finished rendering.

Review the sketch from several points of view. First, imagine standing inside and looking out: what part of the patio is visible, and does the roof or a column interrupt a view you want to preserve? Next, imagine standing at the main door: is the path obvious, or does furniture appear to narrow it? Finally, picture arriving from the yard and joining a group. If the only route crosses directly through a dining or lounge arrangement, ask whether the layout can be adjusted.

Use a few simple scenarios rather than trying to imagine every possible gathering. For a weeknight meal, trace the route from food preparation to serving and then to the table. For a quiet morning, consider where a chair would receive the kind of light and view you prefer. For a larger visit, sketch where extra chairs might go and whether people can still reach the door. These scenarios help distinguish an arrangement that works in theory from one that supports the way you expect to use the home.

Mark the uncertainties directly on the drawing. You might write “confirm afternoon sun,” “review grade change,” or “check view from living room.” Doing so prevents an early concept from being mistaken for a resolved design. If a feature depends on drainage, grading, utilities or the condition of existing landscape, flag it for the appropriate site-specific review. A homeowner’s sketch is a communication aid, not an engineering or construction document.

Ask the design team to show alternatives when two goals compete. For example, one arrangement might give the dining area a more direct route indoors, while another might turn the seating toward a preferred view. A second sketch can make the trade-off easier to discuss than a verbal description alone. Compare the alternatives against the same list of priorities, and note what each one improves or makes less convenient.

It can also help to sketch the patio in relation to the rooms beside it. Note which room opens to the covered area, where large windows look out, and whether the same door serves as a main route to the yard. An outdoor room may feel spacious on its own but constrict movement at the threshold if furniture sits too close to the opening. Conversely, a modest patio may feel connected and generous when its path is direct and the furniture is scaled to the available space.

Keep a dated copy of the sketch and write down the questions it answers. If the layout changes after site information becomes available, compare the new version with the original priorities rather than treating every revision as a setback. The point of reviewing alternatives is to learn what the site and household need, then make informed decisions in sequence. You do not need a finished drawing before starting the discussion; a legible rough plan can be enough to identify the next useful question.

How does outdoor living fit into a custom-home plan?

Outdoor living works best when it is considered alongside the home’s layout and the specific land. Review how doors, windows, dining areas and circulation connect to the patio. JLP’s custom home building process can be a useful starting point for understanding how to begin a project conversation. If you are comparing layouts, browse the floor plans as one way to think through room relationships, while remembering that a plan does not by itself answer site-specific patio questions.

For inspiration, the custom home gallery offers a way to look at completed-home imagery and consider which exterior and indoor-outdoor details appeal to you. Use examples to identify preferences rather than assuming every pictured detail will suit your lot. Save images, note what you like about them, and bring those observations into a conversation about orientation, covered space and how your household will use the yard.

A productive first brief can be short: name your preferred activities, describe the best views or privacy needs, identify any known lot constraints, and rank the features that matter most. If you do not own land yet, say what kind of outdoor experience you hope to create. Being clear about preferences helps keep design discussions grounded while leaving room for site conditions and professional guidance to shape the final solution.

To make that brief practical, organize it into four parts. First, list everyday and occasional uses, such as dining, reading or hosting. Second, describe the connection you want between the kitchen, living areas, patio and yard. Third, identify site observations and unresolved questions about slope, drainage, shade, views and privacy. Fourth, rank the design decisions that matter most, such as a sheltered dining area, an open-air portion or a particular material character. A short list of priorities can be more useful than a long collection of unranked inspiration images.

Bring photographs, sketches or saved examples if they help explain what you mean, but annotate them. Note whether you like the roof depth, the transition to the yard, the seating arrangement or the relationship between the exterior and interior. A photo is a reference, not evidence that the same detail suits a different site. Saying exactly what appeals to you gives the design discussion a clear starting point and allows the team to explore alternatives that respond to your land and home.

Consider the full sequence from initial idea to a coordinated plan. Preferences help shape the conversation; the site informs what may work; the home layout and outdoor rooms need to be considered together; and material, lighting and utility choices follow from the intended use. Some details can remain flexible, while decisions that affect the house, grading or utility coordination may need attention earlier. Ask what needs to be decided at each stage so the patio is not treated as an afterthought.

For a landowner, the first useful question is often what should be reviewed before fixing the home and patio location. For someone still searching, it can be which lot features are essential to the outdoor experience they want. In either case, keep the distinction clear between a preference and a confirmed possibility. The preference guides the conversation; a site-specific review helps establish what can be carried into the design.

Discuss your outdoor-living priorities with JLP

Frequently Asked Questions

Should every patio in the Texas Hill Country be covered?

No. A covered patio may help create shade and shelter, while an open-air area can preserve sky views and sunlight. Decide based on when you expect to use the space, your site conditions and the balance of covered and uncovered areas that suits your household. The design should also account for how roof placement affects nearby rooms and views.

How large should a covered patio be?

There is no single size that fits every household or site. Start with the activities, furniture and circulation you need, then check the layout against the lot and the home. A sketch with approximate furniture dimensions can help reveal whether the planned area supports the intended use. Include space for people to move around the furniture, not just the furniture itself.

Can I plan outdoor living before I own a lot?

Yes. You can identify preferred activities, styles, views and priorities before selecting land. Once you have a property in mind, its slope, orientation, privacy and other conditions need to inform the design. Treat early ideas as a useful brief, not a final site plan.

What is the first step if I already own land?

Gather what you know about the property and explain how you hope to use the outdoor space. Ask what site review and design coordination will be needed before fixing the patio location or layout. The answers depend on the particular lot and home plan.

What should I bring to an outdoor-living design conversation?

Bring a short list of activities, approximate furniture dimensions or a rough layout, photos of the site if available, and questions about views, privacy, slope and drainage. Mark which observations are confirmed and which are guesses. This helps the conversation focus on your priorities while leaving technical and site-specific conclusions to the appropriate review.

Contact JLP Builders to discuss your custom-home plans

A thoughtful outdoor-living plan connects the way you live with the character and conditions of your land, so begin with clear priorities and refine the details with your design team.

Builder and couple discussing a Texas Hill Country custom home floor plan

Custom Home Floor Plan Consultation Texas: What to Expect

A floor plan consultation is less about arriving with every answer and more about identifying what your home needs to do well. In Texas Hill Country, that conversation can connect daily routines and room priorities with the realities of your land, including terrain, elevation, soil conditions, and septic considerations that vary from property to property.

A custom home floor plan consultation Texas buyers can use effectively should clarify your household's priorities, your lot's context, and whether a fully custom design or an Inspiration plan is the better starting point. JLP Builders offers both a Custom Build process with fully custom design and an Inspiration Process using pre-designed plans.

You do not need to choose every finish or solve every layout question in the first conversation. Instead, the goal is to create a practical direction for the design discussion, beginning with what the meeting typically covers and how those decisions take shape.

Ready to discuss your custom home floor plan with JLP Builders?

What Happens in a Custom Home Floor Plan Consultation in Texas?

A custom home floor plan consultation is a guided conversation about how your household lives, what your property can support, and which design direction makes sense. It is not simply a review of room counts or a tour of a floor-plan catalog. The goal is to turn broad ideas into practical priorities for the home you are considering.

Expect to discuss daily routines first. Who will use the home, and how do you want shared spaces, bedrooms, offices, storage, and outdoor areas to connect? Talk through what is working in your current home, what feels difficult, and which spaces need to serve more than one purpose. These details help distinguish essential requirements from features that are only appealing in a photograph.

Your lot is another important part of the conversation. In the Texas Hill Country, rocky terrain, elevation changes, soil conditions, and septic requirements can vary from property to property. JLP's Builder Site Review considers these factors as part of understanding how a home may fit the land. They are questions to investigate, not assumptions to settle before the property is evaluated.

Finally, you can discuss whether a fully custom Custom Build process or the Inspiration Process, which uses pre-designed plans, better matches your starting point. JLP's Texas Hill Country floor plans can provide useful direction, while a custom conversation can explore changes beyond a starting plan. Next steps depend on the needs of your household, the property, and the design path you choose.

Before the Meeting: Bring Your Lot and Lifestyle Priorities

A productive consultation starts with the information that makes your project distinct. You do not need a finished plan or a formal packet. Bring the questions, observations, and priorities that will help the conversation connect your home to your land and daily life.

A simple preparation checklist

  • Lot information: Bring the address or property details you have, along with notes about access, views, slopes, rocky areas, elevation changes, or known soil conditions.
  • Site questions: If the property may need septic, note what you know and what you still need to investigate. Septic requirements, terrain, elevation, and soil conditions can vary from one property to another.
  • Daily routines: List the spaces that support your household, such as a quiet office, guest accommodations, a larger pantry, outdoor living, or a garage that fits your equipment.
  • Priorities and tradeoffs: Identify the features you consider essential and the ones you would be willing to adjust. If more than one person is involved, compare your lists before the meeting.
  • Visual references: Save a few examples of layouts, rooms, or exterior details you like. Use them to explain how you want the home to feel, not as a promise that every detail will transfer directly.

It can also help to explore Texas Hill Country floor plans beforehand. Treat that page as a way to notice patterns in your preferences, not as a substitute for discussing how a design fits your specific lot.

What to prepare for each design path

JLP's two paths call for different starting points. A Custom Build conversation begins with your property and a home designed around your needs. The Inspiration path begins with a pre-designed plan that can help focus the discussion on fit, adaptations, and the way you want to live in the spaces.

Useful preparation for each JLP design path
Custom BuildInspiration
Bring your lot details, household priorities, room relationships, and must-have functions so the conversation can begin with a clean slate.Review plan layouts in advance and mark what works, what does not, and which spaces or relationships you would want to discuss adapting.
Be ready to discuss how terrain, views, access, and site conditions may influence orientation and the home's relationship to the land.Bring questions about how a pre-designed plan may fit your lot and lifestyle, including any changes that would make it feel more personal.
Separate essential needs from preferences so design decisions have a clear order of importance.Note the plan features you want to preserve and the features you would be comfortable reconsidering.

There is no single correct way to arrive prepared. The goal is to make your priorities visible so the consultation can focus on thoughtful decisions rather than trying to remember everything in the moment.

How Your Lot Shapes the Floor Plan Conversation

A floor plan that looks appealing on paper may need a different conversation once it is considered alongside the land. Bring the lot into the discussion early so the design direction reflects how the home could relate to its surroundings, rather than treating the house and property as separate decisions.

Start with the way the lot meets the home

Orientation can affect which rooms face morning or afternoon light, where views may be framed, and how outdoor spaces connect to everyday living areas. If the property has a notable view, mature trees, a preferred arrival route, or a quieter side, point those out. These observations help the builder understand what you want the home to notice and what you would rather screen.

Outdoor living deserves the same attention. Discuss whether you picture a covered gathering area, a private retreat, a place to watch children, or a direct connection from the kitchen or living room. The goal is not to promise a particular layout, but to identify relationships that matter to your household.

Ask how site conditions may influence the plan

Texas Hill Country properties can differ significantly. JLP's Builder Site Review considers factors such as rocky terrain, elevation changes, septic requirements, and varying soil conditions. Utilities and access are also useful topics to raise when discussing the property. The relevant questions depend on the specific lot, available information, and applicable site work, so avoid assuming that one home's solution will transfer to another.

For example, a slope may prompt discussion about how the home approaches the land, while soil or septic considerations may affect where key systems can be located. Those possibilities are conversation points, not guaranteed outcomes or a substitute for property-specific review.

As you prepare, note the lot's orientation, high and low points, views, access, utility information, and any known site constraints. Then review how this discussion fits within JLP's custom home building process. A clear site conversation gives the design team better context for connecting your priorities with a workable direction.

Which Rooms and Daily Routines Should You Discuss?

A useful consultation starts with how your household actually lives, not just a list of room names. Describe a typical weekday and weekend: where everyone enters, drops bags, prepares meals, works, studies, relaxes, and gathers. Those details help turn broad preferences into decisions about room function, adjacencies, storage, privacy, and flexibility.

Start with function, then consider flexibility

For each important room, identify its primary purpose and any secondary use. A room that serves as an office today may need to become a guest room, hobby space, or quiet study area later. A large shared living area may need clear zones for conversation, television, play, or a view. Thinking this way can reveal which spaces should connect closely and which should be separated.

Discuss the transitions between rooms as well. Should the garage or entry connect directly to a mudroom and storage? Should the kitchen open toward the dining and living areas, or should cooking be more private? Where should laundry, bedrooms, bathrooms, and outdoor living relate to one another? These adjacency questions often affect daily convenience more than an isolated square-footage number.

Plan for privacy, storage, and the site

Talk through quiet hours, visitors, children, aging in place, pets, and work-from-home needs. Then identify what must be stored out of sight, from sports equipment and tools to pantry goods and seasonal items. Good storage planning protects the usable spaces from becoming circulation or overflow areas.

JLP's plan families range approximately from 2,400 to 4,100 square feet, with ten families and multiple variants. Treat that range as a starting point, not a promise that a particular plan will suit your household or property. The right arrangement still depends on your priorities and lot conditions.

As a preparation exercise, you can note each room's primary and secondary functions, desired focal points, mood, and features you like or dislike. A general room-planning worksheet can prompt that thinking, but it is not a required JLP form. Bring your notes to the conversation so the layout reflects real routines rather than an idealized checklist.

Custom Design or an Inspiration Plan: Which Path Fits?

One of the most useful goals for a consultation is not choosing a plan on the spot. It is identifying which design path gives your household the right starting point. JLP offers both a fully custom Custom Build process and an Inspiration Process based on pre-designed plans. The better fit depends on how clearly your needs align with an existing starting point and how much of the home you want to shape from the ground up.

When a Custom Build may make sense

A Custom Build begins with your priorities rather than a pre-designed layout. This can be helpful when your lot, routines, household needs, or room relationships call for a home that does not fit an existing plan. The conversation can focus on questions such as how the home should sit on the property, which spaces need to connect, where privacy matters, and what should happen at the transition between indoor and outdoor living.

That does not mean every detail must be decided immediately. The consultation is a chance to explain the way you live and identify the design questions that require a more individualized response. Property-specific conditions, including terrain, elevation, soil, and septic considerations, may also influence what needs to be discussed before a plan direction is established.

When an Inspiration plan may be the right starting point

An Inspiration plan gives you a pre-designed foundation to evaluate and discuss. It can be a practical starting point when the overall arrangement, scale, and character of a plan already resemble what you want, even if you have questions about fit or possible adaptations. Reviewing Texas Hill Country floor plans can help you arrive with clearer reactions, such as which rooms feel essential, which adjacencies work, and what you would want to reconsider.

Neither path is universally better. A custom conversation may be appropriate for one property and household, while an Inspiration plan may make the most sense for another. Bring your priorities, lot context, and honest reactions to the consultation. The purpose is to give the discussion enough detail to determine whether you should refine an existing direction or explore a more fully custom one.

What Decisions Are Made After the First Consultation?

The first conversation is a starting point for organizing the project, not a promise that every design question will be settled at once. The priorities you discuss can be refined into a clearer direction based on your household, your property, and the kind of home you want to build.

One important decision is whether your needs point toward JLP's Custom Build path or its Inspiration path. Custom Build is designed around a fully custom home, while Inspiration begins with a pre-designed plan that can help focus the discussion. The right direction depends on how closely an existing plan fits your goals and how much of the layout you want to shape from the ground up.

Lot information can also influence what deserves attention next. Terrain, elevation, soil conditions, and septic requirements vary from property to property. So the conversation may identify site questions that need further consideration before a layout is treated as a strong fit. That is part of making the plan direction practical for the land rather than choosing a design in isolation.

From there, broader priorities can move toward more specific design conversations. A useful planning sequence generally starts with larger issues, such as how the home should relate to the site and how rooms should work together, before moving toward detailed drawings and specifications. JLP's custom home building process provides context for where these discussions fit within the broader project.

Later conversations may address layout refinements, finishes, and customizations. JLP's Design Center offers decorator guidance through those selection decisions, but the details depend on the home and the direction you choose. If you are considering a turnkey project, you can also review the turnkey building process for a broader view of what follows the design conversation.

Questions to Ask Before You Choose a Design Path

A productive consultation should leave you with clearer questions, not pressure to make every decision at once. Bring the points below so you can evaluate whether a fully custom direction or an adaptable existing plan is the better starting point for your household and property.

  • Does this lot fit the design direction? Ask how rocky terrain, elevation changes, soil conditions, septic needs, driveway access, views, and outdoor living goals may affect orientation or layout. These conditions vary by property, so ask which items require additional review.
  • What is included in the design scope? Clarify whether the conversation is about selecting an existing plan, adapting a plan, or developing a fully custom concept. Ask what decisions are covered now and which belong to later design or selection conversations.
  • How flexible is the plan? Ask which changes are practical to explore, such as room relationships, storage, windows, or indoor-outdoor connections. If you are reviewing an Inspiration plan, ask how its established layout can support your priorities without assuming every change is appropriate.
  • Who needs to be involved? Identify the people who will make or approve decisions about the lot, layout, budget, and daily-use priorities. Agree on how questions and decisions will be recorded so important details are not lost.
  • What records should we keep? Ask how you will receive or organize notes, plan versions, selections, questions, and other project information. A simple shared record can make later conversations more focused.
  • What financial expectations should we clarify? Ask which factors can influence the project, what assumptions are being made, and when more detailed financial information can be discussed. Do not rely on a broad estimate without understanding its scope.
  • What happens next? Confirm the next conversation, information to gather, and decision needed before moving forward. A step-by-step progression from larger design issues toward detailed drawings and specifications is a useful general planning model, but your path may vary.

Ready to discuss your custom home plan with JLP Builders?

Frequently Asked Questions

What should I bring to a custom home floor plan consultation?

Bring your lot information, a rough list of rooms, and notes about how your household uses space each day. It also helps to identify priorities such as views, storage, entertaining, accessibility, privacy, or a dedicated work area. You do not need every measurement or finish selected before the conversation. The consultation is a chance to organize your goals and identify the property questions that need further review.

Can my floor plan be designed around my Texas Hill Country lot?

Yes, the lot should be part of the discussion rather than an afterthought. Terrain, elevation changes, soil conditions, and septic requirements can affect how a home fits the property, and those conditions vary from lot to lot. A builder site review can help connect your preferred layout with the realities of the land before design decisions become too specific.

What is the difference between a Custom Build and an Inspiration plan?

A Custom Build follows a fully custom design path, while the Inspiration Process starts with a pre-designed plan that may be selected or adapted to suit your needs. Neither path is right for every household. The better starting point depends on how closely an available plan fits your routines, lot, and priorities, and how much of the layout you want to shape from the beginning.

Will I choose finishes during the floor plan consultation?

The floor plan conversation should focus first on layout, room functions, circulation, and how the home will work on the property. Finish selections are a separate layer of decisions. JLP's Design Center provides decorator guidance for selections, finishes, and customizations, so you can address those details after the main design direction is established.

Schedule a Custom Home Floor Plan Consultation

A thoughtful conversation can help connect your lot, daily routines, and design priorities before you choose a direction. Whether you are considering a fully custom home or adapting an existing plan, JLP Builders can help you identify the right questions for your property and household.

Contact JLP Builders to schedule a custom home floor plan consultation.

A bright, thoughtfully designed home office with a desk facing a window in a Texas Hill Country home

Home Office Design in Texas Custom Homes: What Remote Workers Are Requesting in 2026

A productive home office needs more than a desk and a spare corner. When planning a home office design in Texas for custom homes, remote workers are often balancing video calls, focused work, family routines, and the desire for a room that still feels like part of a welcoming home. The best layout starts with how you work, then considers privacy, natural light, storage, wiring, and how the room may serve you in the future.

Discuss your custom-home plans with JLP Builders

Whether you already own a homesite or are still exploring your options, put the office on the planning list early. Its location can affect the floor plan, window placement, electrical layout, and how easily work stays separate from home life. Here is a practical way to think through those choices.

What matters most in home office design for Texas custom homes?

Begin with the tasks you do most often, not with a photograph of a room you like. A person who spends most of the day in video meetings has different needs from someone who reads, writes, designs, or handles calls while moving around. Many remote workers do a mix of these things, so a useful office supports more than one work mode.

Write down the main activities and what each requires. For example, video calls may call for a calm background and a place to position a camera. Reviewing large documents may benefit from a broad work surface and clear task lighting. A job involving sensitive conversations may make a door and separation from busy household spaces especially valuable. If you occasionally spread out plans, samples, or equipment, think about where those items can stay without covering the desk.

  • Focused work: Identify what helps you concentrate, such as a quiet room, a view, or the ability to close a door.
  • Meetings: Consider where a camera will face, what appears behind you, and whether household movement will interrupt calls.
  • Equipment: List monitors, chargers, printers, and other devices so power and storage can be considered before construction details are set.
  • Work hours: Think about whether your schedule overlaps with school, household activity, or another person's work calls.

This short workday inventory gives your design conversation a useful starting point. It also helps separate essentials from attractive extras that may not make a noticeable difference to your routine. To make the list concrete, describe a normal workday in blocks: the time you spend on calls, the periods when you need uninterrupted concentration, and the moments when you move between desk work and other tasks. Then mark which activities are fixed and which can happen elsewhere in the home.

For example, a person who has three scheduled calls each morning may need reliable quiet and a consistent camera setup more than a large library wall. Someone who reviews drawings or spreads out paperwork may value a second work surface and accessible storage. A household with two remote workers should consider the overlap: simultaneous calls, different privacy needs, and whether both people can work comfortably without competing for one room. These distinctions help determine whether the plan needs one dedicated office, two separate work areas, or one enclosed room plus a smaller flexible station.

Where should the office sit in the floor plan?

Location is one of the most consequential office decisions because it shapes both privacy and convenience. A room near the entry may make it easier to receive a client or delivery without leading someone through private parts of the home. A room away from the main gathering areas may reduce interruptions. On the other hand, if you need to keep an eye on household activity, an office closer to shared spaces may suit you better.

Consider the routes people take through the home. A desk wall beside a busy hallway may feel less private than the same-size room with a quieter approach. A room close to a kitchen can be convenient for breaks but may hear activity during calls. Think about early mornings, evenings, and days when multiple people are home, not only a typical quiet afternoon.

Also think about the office's relationship to bedrooms and living spaces. If work regularly runs late, placing the office so that calls and lighting are less likely to disturb others may be important. If two household members work remotely, discuss whether they need separate rooms, a shared workspace, or a primary office with a smaller secondary work spot. These are lifestyle decisions; there is no single arrangement that fits every household.

Sketch a simple day-in-the-life map: where you enter, where family members gather, where calls happen, and which rooms need to remain quiet. Then compare possible office locations against that map. When reviewing custom home floor plans, use those routines to identify what might need to change rather than assuming a room label alone tells you whether the layout will work.

A useful comparison is to evaluate each candidate location against the same few questions. How many shared rooms or circulation paths border it? Can someone enter or leave the home without crossing the office? Is there a nearby room where household activity is likely to be loud at the hours you work? Can the office door be closed without blocking a frequently used route? A simple sketch with arrows for household movement can reveal conflicts that are easy to miss when you only look at room names on a plan.

There are tradeoffs to weigh. Near the front of the home, an office may make meetings with visitors more convenient, but it might have more entry noise. Near the kitchen, it may be easy to take a break, but activity can be audible. At the back of the home, it may feel more private, though the walk to shared spaces is longer. Instead of treating one location as universally best, decide which interruptions you most want to prevent and which conveniences matter day to day.

When reviewing a layout, test more than the desk position. Imagine where a guest would sit, where a printer might go, and how someone could move around the room during a call. If you sometimes need to use a laptop away from the desk, consider whether there is a comfortable chair or another quiet spot nearby. Thinking in routes and tasks helps you assess how the office connects to the whole home.

How can you balance daylight, screen glare, and comfort?

Natural light can make an office feel open and pleasant, but the direction and position of windows matter. A bright window directly behind a monitor may create reflections, while a strong light source behind you can make video calls harder to manage. Consider where your desk and screens will sit in relation to windows, and test the arrangement on a sketch before the room's final details are decided.

Window coverings offer control as light changes throughout the day. They can soften direct sun, reduce distractions, and give you more control over a video-call background. Pair daylight with layered electric lighting: general room light for overall visibility and a task light for reading or detailed work. The aim is a comfortable working environment, not a room that depends on one source of light.

Include practical comfort in the discussion. Think about where the room's air supply and controls will be relative to the desk, how the room feels at the hours you typically work, and whether you prefer a view or fewer visual distractions. These details are easier to consider while the room is being planned than after furniture and equipment are in place.

Think through lighting as a sequence, not a single snapshot. Morning light can fall differently from afternoon light, and a room that seems balanced during a midday walk-through may feel very different during your actual work hours. If possible, note when direct sun reaches the proposed desk wall. That observation can guide whether the desk should face toward or away from a window and what kind of adjustable covering you might prefer. You do not need to eliminate daylight; the goal is to keep it useful without letting it overwhelm screens or calls.

Plan distinct lighting for distinct jobs. Overhead light can make the room generally usable, while a desk lamp can direct light onto notes or a keyboard. A background light or a fixture placed thoughtfully in relation to the camera can help calls feel less stark. Before settling on a plan, imagine working at the desk with the screen on, paper in front of you, and a camera active. Consider whether the light is comfortable for all three activities, and whether controls are reachable from the work position.

Comfort also includes the desk chair, foot space, and clear circulation around furniture. Mark the chair's pull-back area on a floor-plan sketch and check whether drawers, doors, and pathways remain usable when the chair is occupied. Decide whether the desk should face a window, face into the room, or sit against a wall. Each arrangement gives a different balance of view, screen placement, and background. The best choice is the one that works with your work habits and room conditions.

How much privacy and sound control do you need?

A home office can look polished and still be frustrating if every household sound carries into a meeting. Start by identifying the kinds of interruptions that matter most: conversation, television, doors opening, pets, or activity in a nearby shared space. Then think about practical ways the plan could limit them, such as choosing a quieter location or providing a door that can be closed.

Sound control is not only about keeping noise out. If you often speak during calls, consider whether voices from the office are likely to carry into nearby bedrooms or living spaces. A room with a useful buffer from active areas may help both the person working and the rest of the household. Furniture, rugs, window treatments, and other soft surfaces can also affect how a room feels acoustically once furnished.

For video meetings, plan a simple background that does not require a last-minute reset before every call. A bookcase, restrained artwork, or an uncluttered wall can work, depending on your taste. Make sure the camera position, desk, and lighting all work together. Keep personal or sensitive materials out of the camera's view and easy to put away when the workday ends.

It helps to rank privacy needs rather than labeling the office simply quiet or noisy. A person who takes confidential calls may prioritize a door and distance from family gathering spaces. Someone whose work is mostly independent may be comfortable with a nearby activity room as long as traffic does not pass directly behind the desk. If children or other household members will be home during working hours, agree on what the closed door means and whether there is another place to ask quick questions.

Consider how the office will work in both directions. Noise may enter from the rest of the home, but calls and meetings may also carry outward. If one person is presenting while another is resting, the room's relationship to bedrooms matters. If the office is beside a living area, think about whether a call schedule overlaps with television or conversation. The plan cannot remove every sound, but identifying the likely conflicts early can help you choose a location and room arrangement that fits your tolerance.

For the camera background, test the real view from the seated position, not just the wall you hope to use. A door that opens into the frame, a bright window, or frequently used shelving may be distracting. If the room needs to change roles, consider a background that can be cleared quickly. Closed storage can hide files and equipment; open shelves can keep useful items accessible, but may need a little organization to look calm on screen.

What should you plan for power, connectivity, and equipment?

List the equipment you already use and anything you expect to add. A single laptop setup has different requirements from a workstation with multiple screens, a printer, and other devices. Note where you want the desk, charging points, and any equipment that needs a stable home. This can help the design team discuss outlet placement and cable management before the walls are finished.

Think about connectivity as a household need, not just an office need. Video calls, online collaboration, and entertainment may happen at the same time in different rooms. Ask how the planned layout and building materials may affect the location of network equipment and whether a wired connection should be considered at the desk. Internet availability and service quality depend on the specific location and provider, so verify those details for the homesite rather than assuming the same solution works everywhere.

Good cable management is useful even if your equipment changes. A clear route for cables, a place to hide power strips, and storage for chargers can keep the work surface easier to use. If you rely on a printer or scanner, decide whether it belongs in the office or in nearby storage. Keep frequently used items within reach and less-used supplies out of the way.

Make an equipment map before you discuss outlet locations. Draw the desk and note where the computer, screens, lamps, phone, headset, and chargers sit. Add any equipment that produces heat or needs to remain accessible, such as a printer or a network device. The point is not to predict every future purchase; it is to identify the kinds of connections and work surfaces that would be awkward to improvise later. Leave room for a changed setup rather than placing every outlet exactly around one current device.

Think about the whole household's connection needs too. If multiple people take calls or stream video at the same time, discuss where the router or network equipment might be placed and ask whether a wired connection at the office should be considered. The right answer depends on the home, service availability, equipment, and household expectations. Confirm internet options for the specific homesite with providers; do not assume a plan that works in one area is offered at another.

Separate daily-use gear from occasional-use gear. A headset, notebook, and charging cable may need to be close at hand, while spare paper or a scanner might be stored elsewhere. A dedicated charging drawer or shelf can reduce the number of loose items on the desk. For a shared office, label or assign storage zones so each person can leave work in progress without taking over the whole surface. Small organization decisions can make a compact room work more smoothly.

How should storage and furniture shape the room?

Measure the furniture you intend to use before finalizing the room's layout. Record the desk's width and depth, the chair's movement area, and any cabinets or shelves. Leave enough room to move comfortably and open drawers or doors. A room that appears generous on a plan can feel tight once equipment and furniture are added.

Built-in storage can give papers, books, and supplies a home, but it should match your actual habits. Open shelving keeps everyday items accessible and visible. Closed cabinets can make it easier to create a calm backdrop and conceal clutter. A combination often gives the most flexibility. Think about whether you need space for physical files, reference materials, a printer, or work in progress.

Also decide what happens at the end of the workday. If the office is visible from a shared space, storage that lets you close away paperwork and equipment can help the room feel less like a workplace after hours. If the office will double as a guest room or hobby space, plan where work materials go when the room changes purpose.

Start with an inventory of what actually needs to be stored. Separate active materials you reach for every day from archived papers, supplies, and equipment used only sometimes. Active materials should be easy to retrieve without interrupting work. Less-used items can go in a higher cabinet, a closed cabinet, or another storage area if that suits your routines. This helps prevent the room from being designed around a large cabinet that may not be necessary or a minimal shelf that cannot accommodate the work you do.

Draw furniture footprints to scale, including the chair when pushed back and when someone is seated. Then check clearances around the door, drawers, and closet. A desk may fit in a room but still block a cabinet or make the path to the window awkward. If you are considering a standing desk or adjustable workstation, account for the change in height and the space for cables and accessories. Make the arrangement work for both sitting and standing if you expect to use both modes.

Storage choices can support the room's visual character as well as its function. Open shelves make books and frequently used objects easy to see, while closed doors reduce visual clutter. If the office appears in video calls, decide which items you want visible and which should be easy to conceal. For a calm look, give papers and small electronics a designated place rather than relying on a clear desk at the end of every day. If multiple people use the office, define separate zones or containers so work does not get mixed together.

Can the office support more than one purpose?

Many households want a dedicated workspace without giving up a room that can serve another role. A guest room-office can work if the desk, storage, and sleeping arrangement do not compete for the same space. A flex room may support exercise, hobbies, or study alongside occasional remote work. The challenge is to plan those uses deliberately rather than expecting every function to fit without tradeoffs.

Ask how often each use will happen and what needs to remain set up. If work is daily and guests visit a few times a year, protecting the work setup may be the priority. If a second person needs the room during calls, the room's capacity for simultaneous use matters more than a foldaway guest bed. Furniture that can move or store efficiently may help, but it still needs a clear home.

Flexibility can also mean planning for a future change in work habits. You may shift to fewer home-working days, change equipment, or need a quieter study space. A thoughtful room can adapt without requiring you to predict exactly how your needs will evolve.

For a guest room-office, map out both versions of the room. In work mode, where does the chair move and where do papers stay? In guest mode, where will the desk chair, laptop, and sensitive materials go? Make sure changing the room does not require a complicated sequence of moving heavy furniture or balancing devices on the bed. A compact desk, wall-mounted shelves, or storage with doors might help, depending on the room and the work. The practical test is whether you would actually reset the space when guests arrive.

For a hobby or study combination, distinguish what can share a surface from what needs dedicated space. Reading, writing, and laptop work may coexist with a clear desktop, while projects that need tools or materials left out may require a separate worktop or cabinet. Decide whether the room should remain ready for work or whether it can be converted between uses. This question affects storage, furniture, and how much clear floor space you need.

Plan for the possibility that work needs change. A room designed around a single monitor and one chair may later need more equipment or a second workstation. Leaving an adaptable wall, flexible storage, or space for a different desk can make future adjustments easier. You do not need to overbuild for every imagined scenario; identify the likely changes and avoid locking the room into an arrangement that is difficult to revise.

How can the office reflect your home's style?

A functional office does not need to look separate from the rest of the house. Connect it to the home's overall palette and materials, then use furniture and accessories to give the workspace its own character. In a Texas Hill Country home, design preferences may include Transitional, Farmhouse, Modern Farmhouse, Contemporary, or Spanish Style elements. The right choice depends on the home's broader design and what feels comfortable to you.

Consider how finishes will look in both daylight and artificial light. A dramatic wall color may make a strong video-call background, while a quieter palette may help the room feel restful after work. Durable surfaces, easy-to-clean finishes, and storage that suits your workflow can be as important as the visual effect. Bring examples of furniture or rooms you like to a design discussion, and explain what you like about them: the light, layout, colors, or organization.

Use references to communicate a feeling and a practical goal rather than treating a photo as a fixed specification. If you like an image because it feels bright, identify the window treatment, wall color, or desk position that contributes to that effect. If you like the orderly appearance, notice whether it comes from closed cabinets, fewer objects, or built-in shelves. This helps translate inspiration into choices that fit the office and the rest of the home.

Think about the room from outside as well as from the desk. If the door remains open, the office may be visible from a hall or shared room. A coordinated palette can make that view feel connected to the rest of the home. If the door is usually closed, you may have more freedom to create a distinct workspace. In either case, decide whether the office should feel like a quiet retreat, a natural extension of nearby rooms, or a combination of both.

Choose finishes and furniture with daily use in mind. A desktop may need to accommodate a laptop, screens, documents, and a drink. Shelves may need to hold books and supplies without feeling crowded. If the room will host guests, its appearance and comfort during that use matter too. Style is most useful when it supports the room's purpose instead of making routine tasks harder.

How do you compare office layout options before settling on one?

It can be difficult to compare two floor-plan options by memory. Use the same checklist for both, and imagine the same workday in each. Rate the basics as essential, preferred, or optional rather than treating every nice-to-have as a requirement. For example, a door may be essential for private calls, while a view may be preferred and a separate printer cabinet optional. This makes it easier to discuss tradeoffs without losing sight of the reasons the room matters.

  • Privacy: Can you close the room off, and what household routes or active spaces are nearby?
  • Desk position: Is there a practical wall or window arrangement for your screen, camera, and task light?
  • Movement: Can the chair move, drawers open, and people pass without interrupting the work area?
  • Storage: Is there room for daily materials, equipment, and items that should be hidden after work?
  • Flexibility: Can the room support a second purpose or a likely change in work setup?

Then mark any deal-breakers. A layout may be attractive overall but unsuitable if the only desk wall places a window behind the monitor, or if the office door opens directly into the chair area. Another plan might have less storage built in but a more useful quiet location. Listing the compromises helps you decide whether a change to the room is worth asking about, or whether another location better matches your daily needs.

Try a furniture-layout sketch with rough measurements. Place the desk, chair, cabinets, and printer, then draw the paths from the door to the desk and storage. If more than one person will use the room, sketch each person's typical position and test whether they can work at the same time. The sketch need not be a formal drawing. Its purpose is to expose conflicts early, when options can still be discussed.

Finally, check the office as part of the whole plan. Ask whether its location supports household routines and whether the room's windows, doors, and adjacent spaces work together. A good office does not need to be the largest room. It needs to be appropriately placed, easy to use, and designed around the work and life that will happen there.

What should you bring to a floor-plan or design conversation?

A few concrete details can make planning more productive. Bring a list of work activities, approximate hours, equipment, and the number of people who may use the office. Add furniture measurements, a note about sound or privacy concerns, and examples of the kind of atmosphere you want. If you already own a lot, note any known site considerations you want to discuss with the builder and design team.

  • Describe a typical workday and which activities require the most concentration.
  • Show where you expect to position a desk, screens, camera, and lighting.
  • Identify household routines that could create interruptions or privacy concerns.
  • List storage needs and whether the room should serve another purpose.
  • Share style references and the practical details you value in those examples.

If you are comparing possible layouts, review the full home rather than judging the office in isolation. The custom home building process is a useful place to learn about how planning and building decisions fit together. The early conversation is a chance to clarify priorities and ask which choices need to be settled before construction details move forward.

Bring a short list of questions, too. Ask what choices need to be made early, which can be adjusted later, and what information the team needs to evaluate the office location. If you are not sure whether a room should be larger, first explain what needs to fit and how you plan to use it. A clear description of tasks, furniture, and storage is more useful than an unexplained request for extra space.

If the office depends on a particular desk, chair, or storage piece, bring dimensions or a photo with measurements. If you have not selected furniture, bring the size range you are considering. Note which items are fixed and which can change. A workstation you already own may dictate a different arrangement than a future purchase, while a printer or file cabinet that can move elsewhere may not need to shape the room.

Talk about the end-of-day transition as well as the workday itself. Do you want the room to close off visually, stay ready for the next morning, or switch to another use? Will documents or equipment need to be put away for privacy? Answers can guide storage and door placement. If there are two remote workers, describe when their schedules overlap and whether they both need quiet at the same time. Specific examples help the design conversation stay grounded in everyday life.

Use JLP Builders' floor-plan options as a starting point for discussing what type of layout suits your household, not as a substitute for describing your office needs. A plan name alone cannot tell you whether a room will work for your chair, monitor position, call schedule, or storage. Treat the floor plan as a framework to review alongside your priorities.

What is a practical sequence for planning the workspace?

Once you have a list of needs, work through the decisions in an order that keeps the room usable. Start with the room's purpose and location, then fit the largest pieces of furniture, and finally consider lighting, storage, and smaller equipment. This sequence can prevent a common mismatch: selecting shelves or decorative details before confirming that the desk and chair fit where you need them.

  1. Define the work pattern. Identify regular calls, focused tasks, hours, users, and any privacy requirements.
  2. Choose a location to evaluate. Compare likely rooms against household routes, nearby activity, and the amount of separation your work needs.
  3. Place the workstation. Sketch the desk, chair, screen, camera, and task light, then check the window and door positions.
  4. Plan support needs. Add storage, printer space, charging, and connectivity considerations once the core arrangement makes sense.
  5. Test the room's other roles. If it is also a guest room or hobby space, sketch that setup too and decide where work materials go.

For example, imagine a household where one person takes morning video calls, another works at a nearby kitchen table, and guests stay overnight several times a year. The office may need a door and a camera-friendly wall, but the key question is whether its location keeps calls away from the busiest route. A guest bed could fit, yet the plan also needs a dedicated place for the desk chair and work materials when visitors arrive. Writing down those overlapping needs makes the tradeoffs visible instead of relying on a vague goal like "make it multifunctional."

Another household may have two people working from home every day. In that case, decide whether one enclosed office can serve them at different times or whether simultaneous calls make separate work zones more practical. A shared desk can be efficient if schedules rarely overlap and both users can adjust equipment. If both need privacy at once, a second quiet location elsewhere may be more valuable than adding storage to the primary office. These are household-specific decisions, so use actual schedules rather than assuming everyone follows the same routine.

Before finalizing details, do a final walk-through on paper. Imagine entering with a laptop, sitting down, joining a call, reaching for supplies, and finishing the day. Check that a visitor or family member can pass through without crossing the camera view or colliding with the chair. Then imagine the room at night or during a different household activity. This quick scenario test often reveals small layout conflicts while there is still time to discuss alternatives.

Keep a short record of the decisions and open questions. Mark which items are must-haves, which are preferences, and which can be adjusted after move-in. Examples might include a closable door as a priority, a window view as a preference, and decorative shelving as something to decide later. This gives the planning conversation a clear direction without pretending that every detail must be settled at once.

Start a conversation about your home office plans

Frequently Asked Questions

Should a home office have a door?

A door can help you limit interruptions and separate calls from nearby activity. Whether it is essential depends on your work, household routines, and the room's location. If you regularly need quiet or privacy, include that need when comparing possible layouts.

Is a window important in a home office?

A window can provide daylight and a view, but desk and screen placement should account for glare and changing light. Consider adjustable window coverings and layered lighting so you can adapt the room throughout the day.

Can a guest room also function as an office?

Yes, if both uses have enough space and a clear plan. Measure the furniture, consider where work items will be stored when guests arrive, and decide which use needs to stay set up day to day.

When should I plan the office in a custom home?

Bring it up while reviewing the floor plan and design decisions, before the room's layout and key details are settled. Early discussion gives you a chance to consider location, furniture, lighting, power, and storage together.

Contact JLP Builders to discuss your custom home

A home office works best when its design reflects the real shape of your workday. Start with the tasks, privacy, and equipment you need, then make choices that allow the space to feel comfortable and connected to the rest of your home.

Custom home under construction in the Texas Hill Country

Custom Home Building Timeline in the Texas Hill Country

Building a custom home in the Texas Hill Country is easier to plan when you separate the construction schedule from the design and pre-construction work that comes first. A realistic outlook accounts for your home's size and complexity, permitting, materials, weather, and site conditions such as rocky terrain, drainage, changing elevations, or septic requirements.

A custom home building timeline in the Texas Hill Country that buyers can use for planning is an illustrative month-by-month framework, not a guaranteed move-in date. JLP documents typical construction ranges of 8 to 10 months for Inspiration plans and 10 to 12 months for Custom homes. With planning and design adding time before construction begins.

The sequence below explains what commonly happens from early approvals through closing. It also shows how JLP's custom home building process uses defined touchpoints and web-based real-time project data to support clearer communication.

Schedule a custom home planning conversation

How a Custom Home Building Timeline in Texas Hill Country Unfolds

A realistic schedule starts by separating planning from construction. JLP documents typical construction ranges of 8 to 10 months for Inspiration plans and 10 to 12 months for Custom homes. Those ranges refer to the build itself, not necessarily the complete period from your first conversation to move-in. Custom planning and design take place before construction begins, and the total timeline depends on the home, site, approvals, materials, weather, and other project conditions.

For a helpful planning framework, think in broad stages. Treat each month as an estimate, not a promise.

  1. Before construction: Preliminary discussions, contract and design work, site-related decisions, approvals where applicable, financing steps, and pre-construction preparation.
  2. Early construction: Site preparation, foundation work, and framing establish the structure and the overall shape of the home.
  3. Middle construction: Mechanical rough-ins, inspections, insulation, drywall, and exterior work move the home from structure to enclosed living space.
  4. Final construction: Finishes, demonstrations, final review, closing, and the transition to warranty support complete the process.
Planning stageTypical focus
Before construction.Design, approvals, financing, and site decisions.
Early construction.Site work, foundation, and framing.
Middle construction.Rough-ins, inspections, insulation, and drywall.
Final construction.Finishes, final review, and closing.

These month allocations are illustrative. A complex custom home may not progress at the same pace as a more straightforward plan. Texas Hill Country conditions can add decisions around rocky terrain, elevation changes, drainage, septic requirements, or varying soils.

Permitting and material availability can also affect sequencing.

A responsible builder should explain what stage is next and identify changes as the project develops. That approach is more useful than offering a fixed completion date before the details are known.

This general overview is intentionally different from a detailed build-on-your-lot timeline. Building on your own lot may require additional site-specific review before construction, but it should not be used to define every custom-home project. For the full sequence of JLP phases and documented customer touchpoints, review JLP's custom home building process.

JLP also uses web-based builder software to provide real-time project updates and build data. That visibility can help homeowners follow progress and have more informed conversations. It does not eliminate weather, permitting, material, or site-related risks.

The most useful timeline is grounded in the actual home and lot. It also leaves room for normal construction variability.

What Happens Before Construction Starts?

Before crews begin site work, a custom home project moves through several decisions and checks that turn an approved concept into a buildable plan. JLP describes this part of the process through preliminary, contract and design, and pre-construction phases. The sequence helps align the home design, property, financing, approvals, and expectations before construction begins.

Preliminary review, contract, and design

The early work starts with understanding the buyer's goals, the selected home plan or custom design, and the intended property. Contract and design work then develops the documents needed to guide construction. For a Hill Country project, the lot or site may require particular attention to terrain, elevation changes, drainage, soils, or septic requirements. The exact review depends on the property and project, so a general timeline should not be treated as a lot-specific schedule.

JLP's custom home building process places pre-construction after the preliminary and contract/design phases. That distinction matters: planning and design happen before the construction period, rather than being counted as part of the time crews spend building the home.

Approvals, appraisal, and construction-loan closing

Where applicable, the pre-construction stage can include a lender appraisal and review by a homeowners association or architectural control committee. These steps help confirm that the project meets the lender's requirements and any community design standards. If the project uses construction financing, the construction loan must also close before the build proceeds. Approval timing can vary by lender, community, property, and the completeness of the submitted information.

The pre-construction meeting

Once the major documents and approvals are in place, the pre-construction meeting brings the project team and homeowners together before work starts. It is an opportunity to review the plans, clarify responsibilities, confirm the next handoff, and address open questions while changes are still easier to manage. JLP also documents later touchpoints such as the pre-drywall meeting, new-home demonstration, and final walk and closing.

For a broader explanation of this stage, see JLP's pre-construction stage guide. This overview applies to general custom-home planning, not the detailed timeline for a specific Build On Your Lot project.

Months 1-4: What Happens During Foundation and Framing?

Once pre-construction is complete, the early build period turns approved plans into a physical structure. The sequence often begins with site preparation, followed by foundation work and then framing. These milestones are useful for understanding a custom home building timeline in Texas Hill Country, but the calendar should be treated as an illustrative planning framework rather than a promise of specific month durations.

Site preparation and foundation

Before concrete is placed, the site may need preparation based on its existing conditions. Rocky terrain can affect excavation, while elevation changes may influence grading and how the home sits on the lot. Drainage planning also matters, particularly where water needs to move safely away from the structure. Depending on the property, septic requirements and soil conditions may add reviews, coordination, or site work before the foundation can advance.

These variables are one reason two homes with similar plans can follow different schedules. Weather, permitting, material availability, home size, and complexity can also affect progress. The appropriate goal is not to force every project into the same sequence, but to identify the next milestone and address site-specific decisions early.

Framing brings the plan into view

After the foundation work reaches the necessary checkpoints, framing begins to define the home's rooms, walls, openings, and roofline. For buyers, this is often when the design becomes easier to understand in three dimensions. It is also a practical time to confirm that major layout decisions align with the approved plans before later construction layers conceal the structure.

JLP's documented process includes construction touchpoints as the home progresses. A clear review of site conditions, foundation milestones, and framing progress helps keep expectations realistic while preserving flexibility for the conditions of the lot.

Months 4-6: When Do Rough-Ins and Inspections Happen?

After the foundation and framing establish the home's structure, rough-in work brings the systems that will support daily life into view. Plumbing, electrical, heating, cooling, and other mechanical components are positioned before walls are enclosed. The builder also coordinates these systems with the framing and plans so that essential connections, clearances, and penetrations are addressed before insulation and drywall.

The inspection stage is not one single event. It consists of checkpoints tied to the work completed and the requirements that apply to the project. For buyers, this is an important point in the custom home building process: progress is measured not only by visible construction, but also by confirming that underlying work is ready for the next phase.

What happens before the walls are closed?

A pre-drywall meeting gives the homeowner and project team an opportunity to review the work while framing and rough-ins remain accessible. It is a useful time to ask questions about system placement and coordination, clarify approved details, and understand what comes next. The sequence can vary with the home, site, permitting requirements, and inspection coordination. Treat these months as an illustrative planning window, not a fixed schedule.

JLP documents a 17-point inspection program that includes engineering, third-party, internal, and specialized checks, including slab elevation verification. That documented program is a quality-control framework, not a promise that every home follows an identical calendar or inspection breakdown. Buyers should focus on the larger milestone: rough-in work is reviewed and coordinated before the home moves into the enclosed interior stages.

Months 6-10: When Do Finishes and Exterior Work Take Shape?

Once rough-ins and pre-drywall checks are complete, the home begins to look and feel more like a finished space. This portion of a custom home building timeline in Texas Hill Country is an illustrative planning phase, not a guaranteed schedule. Home size, design complexity, weather, material availability, site conditions, and permitting can change the sequence.

From insulation to interior finishes

Insulation typically follows approved rough-in work, then drywall closes in the rooms and creates the surfaces for paint and trim. As those areas become ready, cabinets and other built-in elements can be installed. Flooring follows according to the home's specifications and the needs of each material. Some work may overlap, while other steps must wait for a preceding trade to finish and pass a quality check.

Fixtures, hardware, plumbing trim, lighting, appliances, and other finish details are then coordinated throughout the home. This is when selections made during design become visible in the rooms. It is also a practical time to identify questions early, before small details affect later work.

Exterior completion and punch-list coordination

Exterior work may continue alongside interior finishes. Depending on the home's design and site, crews may complete siding or masonry, roofing details, exterior doors, windows, paint, drainage elements, porches, and other outdoor features. Hill Country terrain, elevation changes, drainage requirements, and soil conditions can affect how this work is sequenced.

Near the end of construction, the team coordinates remaining corrections and unfinished details into a punch list. The goal is not simply to make the house look complete, but to review the work carefully and resolve items before the final walk. JLP identifies the final walk and closing as documented construction touchpoints, while the exact timing depends on the project.

What Happens at Final Inspections, Closing, and Warranty?

The final stage brings the home from active construction to move-in readiness. It is less about one dramatic finish line and more about completing inspections, reviewing the home carefully, and documenting the transition into ownership.

Final inspections and the certificate of occupancy

Near completion, required inspections and approvals are addressed for the home and jurisdiction. A certificate of occupancy is a general milestone indicating that the applicable authority has determined the home can be occupied. Requirements and issuance can vary by location. Treat it as part of local closeout instead of assuming that every Texas Hill Country community follows the same steps.

Demonstration, final walk, and closing

JLP identifies a new-home demonstration and a final walk and closing among its construction touchpoints. During the demonstration, buyers can learn how key systems and features operate. The final walk provides an opportunity to review the completed home, identify items that need attention, and clarify next steps before closing. JLP's documented custom home building process places these milestones within the broader construction and warranty phases.

Closing is the formal ownership and financial transition handled with the relevant parties. The timing depends on the completion of required approvals, lender and title coordination where applicable, and resolution of outstanding items. A realistic custom home building timeline in Texas Hill Country should leave room for this coordination instead of treating the last construction activity as the same day as move-in.

What happens after closing?

Warranty is the post-closing phase, not an indication that every future issue is unexpected or that maintenance is unnecessary. JLP documents warranty coverage phases that include one year for workmanship, two years for mechanical systems, and ten years for structural coverage. Review the applicable warranty terms, reporting process, and exclusions so you know how to raise questions after the keys change hands.

Ready to discuss your project timeline? Contact JLP Builders before the FAQ.

Frequently Asked Questions

How long does a custom home build take in the Texas Hill Country?

JLP documents typical construction ranges of 8 to 10 months for Inspiration plans and 10 to 12 months for custom Build On Your Lot homes. These ranges describe the build itself, not the full planning-to-move-in timeline. Planning, design, approvals, and site preparation may add time before construction begins, so the expected schedule depends on the home and property.

What can cause a custom home schedule to change?

Several factors can affect the sequence or timing, including home size and complexity, weather, permitting, material availability, and site conditions. Texas Hill Country properties may also involve rocky terrain, elevation changes, drainage considerations, septic requirements, or varying soils. A realistic schedule should account for these conditions rather than treat a month-by-month outline as a guarantee.

Does the building process include planning and design?

Planning and design are part of the broader custom-home process, but they occur before the main construction period. JLP identifies preliminary, contract and design, pre-construction, construction, and warranty as process phases. Pre-construction may include items such as an appraisal, applicable HOA or ACC approval, construction-loan closing, and a pre-construction meeting.

What milestones happen before closing?

Construction touchpoints can include pre-drywall review, a new-home demonstration, and a final walk followed by closing. The exact sequence depends on the project and required approvals. These checkpoints give the homeowner opportunities to understand the home, review completed work, and prepare for the transition into ownership.

What does JLP's real-time build data mean for homeowners?

JLP uses web-based builder software to provide real-time project updates and build data. This is intended to improve transparency and help homeowners stay informed during construction. It does not guarantee a completion date or prevent delays, and the documented description does not establish specific features such as daily photos, alerts, messaging, or inspection-record access.

Ready to Plan Your Texas Hill Country Build?

Every custom home timeline begins with understanding the home, site, and decisions involved. JLP Builders can help you discuss your goals and develop project-specific guidance for your Texas Hill Country build. Contact JLP Builders to get started.

Inventory Homes in Texas Hill Country: A Faster Path to a New Home Near New Braunfels

Searching for new construction homes in New Braunfels can mean comparing very different paths: a home that is already built or underway, a home selected from available inventory, or a custom home planned around your preferences. The right fit depends on how much flexibility you want, what is currently available, and how much of the process you want to shape.

Start a conversation about your home plans

For buyers near New Braunfels, an inventory home can be a useful route to explore when you want to consider a home that is further along than a brand-new design. It is not a promise of a particular move-in date; current availability and the remaining work on any home need to be confirmed individually.

New construction homes in New Braunfels: Inventory or Custom?

“New construction” describes a broad set of possibilities, not one specific buying experience. Some buyers begin with an available home, while others begin with a homesite, a plan, or a conversation about a fully custom design. Before comparing listings, decide which parts of the home and process matter most to you.

An inventory home is a home a builder has made available for buyers to consider. It may be complete, under construction, or at another stage, so ask what is finished and what decisions, if any, remain. The word “inventory” alone does not tell you whether a home is ready for occupancy, whether its features can be changed, or what the next steps will involve.

A custom build on your lot option, gives you a different starting point. You may be considering a homesite you own or plan to acquire, a plan that can be adapted, or a fully custom design. That route can offer a broader role in shaping the home, but it also involves working through design and project decisions. Exact scope and timing depend on the specific project; avoid assuming a build will follow a standard schedule.

JLP Builders offers Build On Your Lot homes as well as turnkey and move-in-ready inventory homes in the Texas Hill Country. Buyers do not have to own a lot just to begin exploring options. To understand the steps involved in a custom project, see the overview of JLP’s custom home building process.

Why consider an inventory home?

The main appeal is having a specific home to evaluate rather than starting every decision from a blank page. Depending on the home’s status, you may be able to see its layout, finishes, and setting in person or review details about a home already underway. That makes it easier to decide whether the existing choices suit your needs before proceeding.

Inventory can also be relevant if your plans are taking shape but you are not ready to settle on a homesite and design from scratch. Comparing available homes may help you understand what is possible in the area and which features matter most to you. Still, inventory changes, and the details of an individual listing can change as a home progresses. Confirm the current status directly rather than relying on old listing information or assumptions.

Most importantly, “faster path” is a relative description, not a guaranteed timeline. A home that is further along may involve fewer early design choices, but buyer due diligence, financing, contract terms, remaining construction, and other project-specific steps still matter. Ask for a current explanation of the process for the particular home you are considering.

What to compare before choosing a home

Look beyond a listing headline. A practical comparison should help you understand the home as it exists now, what is included, and what you will need to decide or verify before making a commitment.

  • Construction status: Is the home complete, still under construction, or at another stage? Ask what work remains and how completion and possession will be addressed in the agreement.
  • Included features: Request a clear description of the finishes, fixtures, appliances, and other features included in the home. Do not assume a photo or model image represents the exact home or its included selections.
  • Changes and selections: Ask whether any choices remain open and whether changes are possible at the home’s current stage. The answer can depend on what has already been ordered or completed.
  • Homesite details: Confirm the property’s boundaries, access, utilities, site conditions, and any other details relevant to that specific location. Do not assume two lots nearby have identical characteristics.
  • Price and contract scope: Review what the stated price covers, any allowances or exclusions, and how changes are handled. Request a project-specific explanation instead of relying on a general price assumption.
  • Warranty and follow-up: Ask what warranty information applies, how concerns are reported, and what documentation you will receive. Review the actual terms for the home rather than relying on a broad description.
  • Location and daily routine: Consider the specific address, commute, access, nearby services, and how the area fits your everyday plans. Check details that matter to you independently.

These questions also make it easier to compare inventory with a custom option fairly. An available home may suit you as it stands, while another buyer may prefer to make more decisions about layout and finishes. Neither route is automatically better; the useful comparison is between a particular home’s verified details and the priorities you have for your own project.

How to explore JLP inventory near New Braunfels

Start with the JLP Builders available homes and inventory page to see the homes currently presented online. Treat it as a starting point, then confirm availability and details with JLP. A webpage may not answer every question about construction status, included features, contract terms, or the next steps for a particular property.

When you reach out, it helps to describe what you are looking for. For example, tell the team whether you are focused on a home that is already underway, are open to a turnkey option, or want to discuss building on a lot. Share your preferred general area, the features that matter most, and any questions you already have. You do not need to have every decision made before starting a conversation.

If nothing currently listed fits, ask whether another path may make sense. JLP’s offerings also include Build On Your Lot and custom design options. A buyer without land can still begin exploring; land ownership is not a prerequisite for an initial conversation. The next step may simply be clarifying whether a current inventory home, a future opportunity, or a custom project best matches your goals.

When build-on-your-lot may be a better fit

Inventory may not be the right answer if the available homes do not suit your desired layout, location, or priorities. A custom build can be worth exploring if you already have a homesite, expect to acquire one, or want a more tailored starting point. JLP’s Build On Your Lot offering is designed for projects on a buyer’s lot, and its broader approach includes both plans and fully custom possibilities.

Before choosing that route, consider how ready you are to work through the project decisions. Think about your preferred home style, functional needs, site questions, and overall planning range. For Hill Country homes, locally popular styles include Transitional, Farmhouse, Modern Farmhouse, Contemporary, and Spanish Style. These are starting points for discussing appearance, not a checklist you need to settle before speaking with a builder.

Cost depends on the project and lot-specific factors, so a general article cannot provide a reliable quote. JLP does not publish a firm per-square-foot rate. For an informed comparison, discuss the scope and relevant site variables with the builder and request a project-specific quote. Planning figures should be treated as estimates, not guaranteed pricing.

Also consider the kind of flexibility you value. A completed or nearly completed home can give you a concrete option to assess, while a custom path may involve more decisions and a different sequence of steps. Ask what can still be selected or changed on an available home and what choices are part of a custom project. The details are more useful than a broad promise about speed or customization.

Questions to ask before taking the next step

Whether you are looking at a current listing or considering a custom project, bring practical questions to the conversation. Ask who will explain the home’s current status, what documents describe its specifications, and how the process moves forward if you decide to proceed. If you are comparing multiple options, use the same questions for each one so that you are evaluating equivalent information.

  • Can I confirm whether this specific home is available, and what is its current construction status?
  • Which features and finishes are included in the home as offered?
  • What decisions or work remain, and how will those be documented?
  • What should I know about the homesite and the property-specific terms?
  • If this home is not the right fit, can we discuss inventory alternatives or a custom-build path?

Clear answers help you understand what you are considering without confusing a general description with a commitment. Take time to review the relevant documents and confirm information that affects your decision. A helpful first conversation is about fit and facts, not pressure to choose before you are ready.

A simple way to compare your options

It can help to make a short comparison sheet before you contact a builder. Write down the features you consider essential, the items you would be willing to compromise on, and the questions you need answered before making a decision. Keep facts you have verified separate from items you still need to confirm. This reduces the chance that a polished photograph or a broad description will stand in for details about the actual property.

For each inventory home, record the address or listing name, current status, included specifications, any selections still available, and the documents you have received. If an answer is not yet known, note that too. Then compare the home with your priorities: layout, setting, style, and the degree of choice that remains. The purpose is not to turn the decision into a score alone; it is to make important tradeoffs visible.

For a custom-home conversation, prepare a similar list, but begin with your lot situation and general goals. If you own land, gather the information you already have about it and ask what else is needed to discuss the site. If you are still looking for land, be clear about that. You can also bring reference images or describe a style you like, such as Contemporary or Spanish Style, without treating an inspiration image as a final specification.

Budget conversations should also distinguish a planning range from a quote. Explain the scope you have in mind and ask which site-specific or design choices could affect the project. A listing price and a custom quote are not automatically comparable if they cover different features, land arrangements, or stages of completion. Review the actual scope and terms for each option before drawing conclusions.

Finally, choose a next step that matches your readiness. You might first ask for details about one available home, request a conversation about a custom project, or continue researching both. There is no need to assume that an inventory listing is the only route or that you must select a final design immediately. The objective is to understand the real choices in front of you and determine which one deserves a closer look.

Discuss inventory and custom-home options with JLP

Frequently Asked Questions

Are inventory homes the same as move-in-ready homes?

Not necessarily. Inventory describes a home made available for buyers to consider, but its construction stage can vary. Confirm whether a specific home is complete, underway, or at another stage, and ask what remains before occupancy.

Does choosing an inventory home guarantee a faster move-in?

No. A home that is further along may offer a different starting point than a new custom design, but timing depends on the particular home, remaining work, contract, financing, and other circumstances. Request current details for the home you are considering rather than relying on a general timeline.

Do I need to own land before contacting JLP Builders?

No. JLP welcomes conversations with landowners and people still exploring options. Its offerings include inventory homes as well as Build On Your Lot and custom-home paths, so you can discuss what fits your situation.

Where can I see current JLP inventory?

Visit the available homes page for listings, then contact JLP to confirm the current status and details of any home that interests you. Online information is a starting point and may not cover every project-specific question.

What if I want a home designed around my lot?

Ask about JLP’s Build On Your Lot and custom-build options. A conversation can help clarify the information needed about your homesite and the choices involved before you decide on a path.

Whether you are comparing an available home or beginning to plan a custom build, start with the details that matter to you and verify them for the specific project.

Contact JLP Builders to discuss your next step

As you compare options, keep a written record of confirmed details and open questions. That gives you a clear, practical basis for deciding whether an available home or a custom project is the better next step for your plans.

Texas Hill Country custom home sized for its lot and lifestyle

How Big Should My Custom Home Be in the Texas Hill Country?

Choosing between a 2,400-square-foot home and a 4,000-square-foot home is not simply a question of wanting more rooms. In the Texas Hill Country, your lot, slope, views, drainage, household routines, and plans for outdoor living all shape what the right size means.

Read more ...
Custom home master suite design in Texas Hill Country with a spa-inspired bath and scenic windows

Custom Home Primary Suite Design: Texas Hill Country Guide

A primary suite in the Texas Hill Country should do more than add square footage. It should make daily routines feel easier while responding to your lot, terrain, privacy needs, and the views you want to keep in frame.

The best custom home primary suite designs in the Texas Hill Country connects the bedroom, spa-inspired bathroom, dressing and storage areas, and outdoor outlook into one practical plan. JLP Builders can tailor layouts and room sizes for landowners building on their own lots as well as turnkey buyers. Features such as dual vanities and walk-in closets are design considerations to confirm for the selected plan and project scope.

Start by thinking about how you wake, get ready, relax, and move through the suite. Then discuss your Hill Country floor plan with JLP Builders around those routines, the homesite, and the sightlines that make your property special.

Read more ...
Custom Texas Hill Country home with limestone, cedar accents, and a covered patio

Texas Hill Country Home Design Trends 2026

Designing a Hill Country home in 2026 is less about copying a popular look. It is more about making the home feel right for its lot, climate, and daily life. The strongest choices connect regional character with practical comfort, from daylight and shade to materials that feel at home in the landscape.

For buyers researching Texas Hill Country home design trends in 2026, the most useful approach is to treat trends as flexible options. Consider architecture, outdoor spaces, finishes, and technology together. Then adapt each decision to your land, lifestyle, and long-term priorities.

Read more ...